What To Know Before Your First Pottery Making Class in 2026
Who hasn’t been captivated by the intricate process of pottery making? It’s one of the most striking art forms around, beloved for both beauty and function. The pottery making process reaches back to the earliest days of human creativity, which taps into something primitive and pure in us all.
If you're itching to start making pottery, we've got everything you need to know, from arranging your first lesson to common techniques and materials you'll encounter.
Though creating clay vessels has evolved through the centuries, the basic pottery making process is the same as what our ancestors followed: shaping clay into something lovely, like a clay sculpture or useful, like a mug.
Plus, did you know that having a creative hobby like pottery making can be beneficial to your mental and physical health? According to WebMD, research has shown that engaging in artistic activities can affect mood, behavior and general well-being. Pursuing a creative outlet can even improve problem-solving.
If you’ve ever wondered how to make pottery yourself, the article below will give you some inspiration before your first class. By starting pottery for beginners, you might be about to find that pottery making is the right creative hobby to spark your creativity and elevate your mood!
Jump to Section
- Learning How to Make Pottery
- Pottery Making Supplies
- The Pottery Making Process
- Common Pottery Making Techniques
- Pottery Making FAQs
Learning How to Make Pottery
Hands-on Pottery Classes

Unless you have pottery making tools in your home, it's likely you'll be heading to a pottery making class in your area. Options are abundant, so just make sure to choose a local and professionally led pottery class where you'll get the support required in the early days of learning. Starting out with pottery making is fun, but it can also be challenging, so don't be hard on yourself as you learn the ropes.
An experienced potter will teach you useful tips and give you an in-depth understanding of topics like ceramics vs. pottery, the best types of clay for pottery, the best methods for glazing pottery and more. Remember, if in doubt, just ask!
Pottery Making Courses
/pottery_classes/Pottery_class_spinwheel.png)
Many pottery making classes are held as part of a larger ongoing curriculum. These pottery making courses will give you the opportunity to progress your skills over the long term and are often available at a cheaper rate per class. You'll get to store your objects and learn more advanced techniques as you master the beginner ones.
You can sign up for a pottery making course in San Francisco, San Diego, NYC and virtually any other place around the country, where you’ll have talented artisans at the ready to teach you, in studios that provide all the necessary elements for pottery making as part of your course. If you want to learn alongside a friend, a creative gift card is the ultimate pottery gift.
Pottery Making Supplies
Selecting Clay

Of the various types of clay for pottery, earthenware and stoneware are the easiest clays when it comes to pottery for beginners. Earthenware is great for creating decorative pottery pieces such as pendants, jewelry pieces, plant pots, countertop and desktop bowls for holding small items.
Its surface remains porous if fired without glaze, giving it a rougher, more rustic texture. Stoneware is a better choice when crafting heavy-use pieces such as dishes, mugs and other usable food items. It can be glazed for water and food safety and resists chipping and staining when finished properly.
Choosing Glazes

Glazing pottery involves covering your pottery in crushed glass and minerals suspended in water that solidify and bond with the clay when heated. You can choose from a variety of different glazes to use for pottery making, depending on the purpose of your piece.
There are a variety of artistic and functional glazes available in a dazzling selection of colors and finishes. If you’re making dishware, make sure you choose a glaze made for that purpose.
Because the glaze and the clay will need to reach the right temperature to harden at the same time, you should make sure both have matching cone ratings, which determine the level of heat required.
Using a Kiln

Firing is the final step in pottery making. This is where your piece is heated to a high enough temperature to solidify (or cure) both the clay and the glaze. The oven used to fire pottery is called a kiln.
The clay and the glaze you choose will determine the temperature and time spent in the kiln. Because of the safety factors involved in pottery making, it’s best to work with a professional potter and kiln house to make sure your pottery is fired properly and safely. Having said this, making a pottery kiln at home is entirely possible. Learn to build your own DIY potter's kiln!
The Pottery Making Process
Decorative Pottery or Functional Pottery

It’s important to decide before beginning if you’ll be making a decorative pottery piece that can stand on a table, desk or shelf or a usable pottery piece that can hold food and/or water.
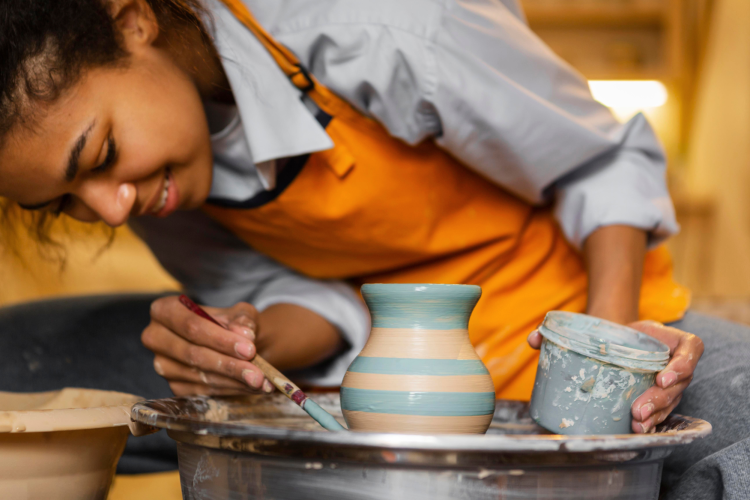
Sometimes, a functional piece can also be decorative, like a vase or a fruit bowl. Make sure you opt for food-safe materials in these instances. Once you know what you’ll be making, you can choose the right type of clay and glaze to use. You can also decorate your pieces by painting ceramics with fun and unique ceramics projects and pottery painting ideas. No matter what you decide to make, don't forget to learn how to design a potter's mark so you can distinguish your designs from others.
Shaping Your Piece
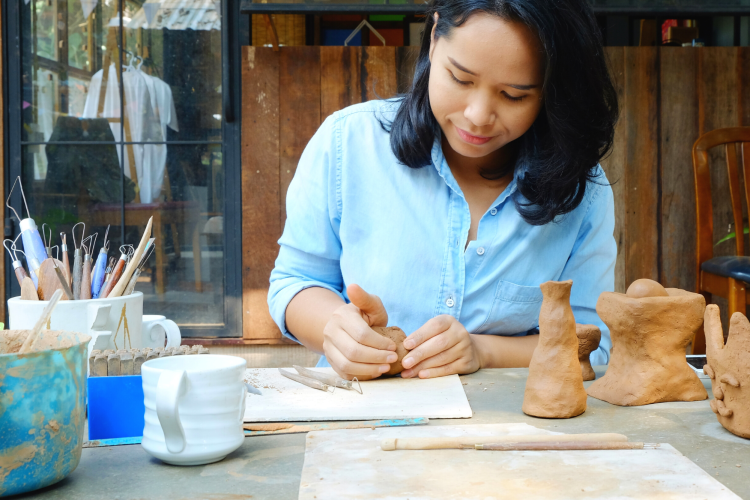
There are several ways to turn raw clay into a piece of pottery. We'll go into some common pottery techniques in more detail below. Pinch pots are the easiest pottery making project for beginners. They’re made exactly how they sound: clay pinched into the shape of a bowl, pot or dish.
As a simple hand building pottery idea, they’re usually no larger than the palm of your hand and they’re excellent for getting a feel for pottery making. You can also build pots, cups, plates and other vessels by coiling thin strips of rolled clay on top of one another.
And when you’re ready to be adventurous with your pottery making, you can try carving delicate patterns into the surface of your pieces by removing small sections of clay.
Using a Pottery Wheel
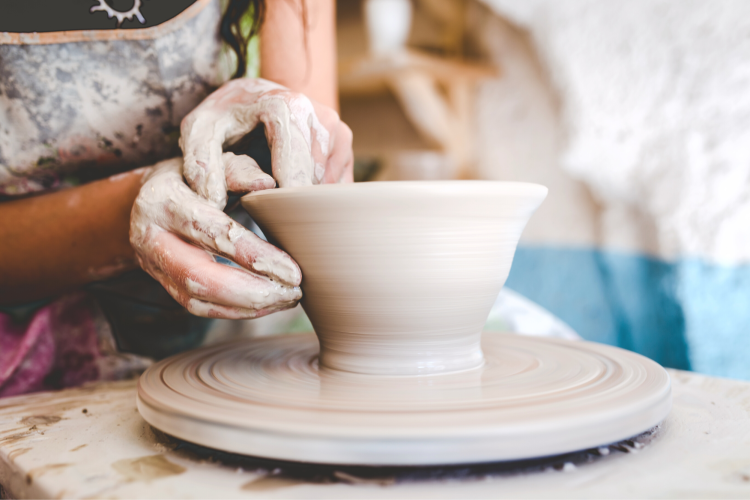
The most familiar element of pottery making is the pottery wheel! Older versions are operated by pushing your feet along a wheel at the bottom to spin the table at the top. Newer versions are electric and allow for various speeds.
With a pottery wheel, a vessel is built up using the coiling method, then spun on the wheel and smoothed with your hands or various pottery tools. This allows you to thin the walls of the vessel by gently pulling the clay to expand the size and shape. It can be thrilling to watch — and even more thrilling to actually turn the wheel yourself!
You may also hear the term “wheel throwing” used with this process. There’s no actual throwing involved; it’s just another term for using a wheel in pottery making.
Smoothing

Once the shape of your piece is set, the next step in the pottery making process is smoothing. There are several ways of smoothing pottery. In the most basic process, a wet sponge is pressed gently against the outside of the vessel while it turns on the wheel.
As it spins, the sponge is dragged up gently from top to bottom. This happens repeatedly until the desired smoothness is achieved. A more advanced version of this process uses a flat wooden smoother tool to burnish the clay before firing. After smoothing, you can use a length of wire to slice the base of your piece and free it from the wheel.
Drying

When your piece is completely shaped and smoothed, you’ll need to let it dry for a while. Clay that isn’t dry enough before firing in a kiln can explode, destroying hours of hard work. Making a pottery creation and seeing it shatter can be devastating, so remember not to rush.
To prevent this, your piece should be air-dried for at least seven days, until it becomes “bone dry.” It will be pale and solid, and feel warm and dry to the touch rather than cool and damp. Before it goes into the kiln, you’ll want to apply glaze to create brilliant color and add shine to your piece.
Glazing

Once your clay is bone-dry, it’s time for the glazing process! Based on the type of clay you’ve used, you can choose from a number of colorful glazes in different finishes, from velvety matte to supergloss. Low-fire glazes are economical and produce vibrant colors when fully fired, while mid-fire glazes create subtle, earthy finishes.
The glaze itself is made from finely-ground minerals in liquid that adhere to the surface of your piece. When heated to the right temperature, the minerals melt and fuse with the clay, forming a bond and bringing out the final finish.
To mix your glazes, add glaze powders to water, mixing and straining until you reach the proper consistency. Be sure to wear gloves, a mask and proper eye protection to keep from accidentally consuming the powders. After mixing, let your glaze stand for a full 24 hours before using it.
Then, you can brush it on or dip your piece into the glaze to achieve the intended design. Add water to improve the consistency if it gets too thick. Once you’ve finished adding your glaze, set your piece aside to dry fully before firing.
Firing
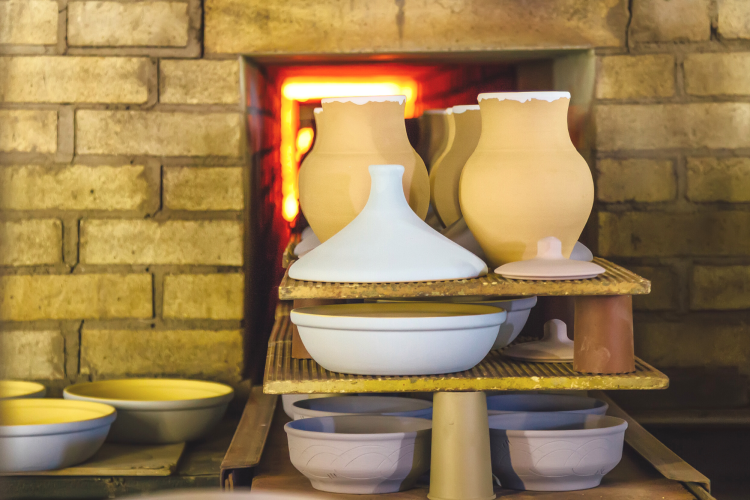
Your piece will go into the kiln at the temperature determined by your clay and glaze cone ratings. This means they can be fired at temperatures between 1845 and 2305 degrees Fahrenheit. That’s incredibly hot, which is why a professional kiln is always recommended!
The firing process can last from 10 to 24 hours, which means you’ll be leaving your piece to pick up at a later date. Rest assured, it will be worth the wait!
Common Pottery Making Techniques
Pinch Pottery

Pinch pottery is a simple and fun technique you can use for pottery making. This method involves pinching a ball of clay with your thumb and fingers to create a vessel in the middle, such as for a bowl or vase. You’ll pinch and slowly rotate the ball to widen the hole of the vessel. Ensure each side of the pottery is even and smooth across the clay. This technique is commonly used among both beginners and professional pottery artists.
Coiling
Coiling is a cool method you can use to create stunning vases with pottery making. You’ll use your fingers and palm to press and roll a clay ball into several coils for your design. Make sure each coil is smooth and even across the clay. Then, add a watered-down version of clay around the base of your design and each coil piece. This will help your coils stick to the base as you wind them up around your pottery for a unique piece.
Slab Construction

If you’re looking for a fun and easy pottery-making technique, try slab construction to craft eclectic clay boxes or vases. Use a rolling pin to create slabs of clay. Then, gently score each piece and add a liquid clay mixture to help each slab stick together. You can then add coils or additional clay slabs for a one-of-a-kind design. Slab construction provides you with the opportunity to create distinct shapes you can’t make using a pottery wheel.
Wheel Throwing
When most people think of pottery making, a vision of a pottery wheel might come to mind. Wheel throwing is a technique that allows you to create custom bowls, vases and plates using a pottery wheel. You’ll first want to center the clay on the wheel so it’s easier to add a vessel to the middle of your design. Then, shape your artwork by pulling and applying pressure to the clay, making the walls of the clay narrower or wider at certain sections. Wheel throwing requires practice and patience, but can be an excellent way to make truly unique pottery.
Pottery Making FAQs
What is Pottery Making Called?

Pottery making is commonly referred to as “making pottery” or “throwing pottery”. “Throwing” is a common term when creating pottery. Some people base this term on the fact that they throw clay onto the pottery wheel when crafting their design. Others mention that “to throw” can also be defined as “to turn”, which is an accurate description when using the pottery wheel.
How Much Does it Cost to Make Your Own Pottery?
Making your own pottery can vary in price, depending on whether you’re using a community studio or creating your own home studio. Professional studios often offer monthly memberships that provide access to professional-grade equipment, pottery tools, and possibly even clay. You’ll also have access to classes and instructors for guidance while creating your pieces.
If you’d like to set up your own studio, it can be more expensive, with possible expenses for clay, tools, materials and a professionally built or even DIY potter's kiln. Your home studio might cost you around $1,000 or more, while a membership at a studio could be a couple of hundred dollars per month, plus additional expenses for clay and access to a kiln. So do the math and go with whatever makes sense to you and your budget.
Do I Need a Kiln To Make Pottery?
While a kiln is certainly one of the most effective ways to fire pottery, there are other options for finishing off your pieces. You can use air-dry clay to craft your pottery, a type of clay that hardens when it’s exposed to air. You can also do raku firing or pit firing, both methods that involve digging holes in the ground to help trap heat to fire your pottery.
If you try either of these techniques, follow safety precautions to ensure your own safety and that of your environment. Lastly, you can also use an oven to fire your pottery, particularly for salt dough pieces. Although a kitchen oven is an option for firing, the temperature does not heat to nearly the same temperature as a kiln.
What Do You Call a Person Who Makes Pottery?
There are several names for people who make pottery, but they are mostly commonly referred to as potters. Many potters are also called ceramic artists or sculptors, depending on the pottery pieces in their collection.
Once you know how to make pottery and try it for yourself, don’t be surprised if you get hooked! Seeing the finished piece from your adventures in pottery making is one of the most exciting creative moments you can have. For now, don't worry too much about having your own pottery tools or the information; you'll have all you need provided for you in your class.
And turning raw clay into a beautiful and possibly usable piece of art will give you a sense of accomplishment you’ll want to have again and again.
For even more creative ideas and inspiration, check out other experiences happening on Classpop!