Painting Ceramics for Beginners: What Works and What Doesn’t in 2026
Painting ceramics often feels deceptively simple. A mug, a bowl or a small figurine looks like an easy place to start — until the paint doesn’t stick, dries unevenly or behaves nothing like you expected.
For beginners, the challenge usually isn’t creativity. It’s figuring out which paints actually work on ceramic surfaces, how glazed and unglazed pieces react differently and whether your pottery ideas are meant to be decorative, functional or somewhere in between. Those early choices tend to decide how the whole piece turns out.
That’s not just beginner frustration. According to research on ceramic painting practices, surface preparation and material choice play a big role in how painted ceramics hold up and how the design reads once it’s finished. In other words, the “how” matters just as much as the idea behind it.
If you’ve worked with clay before or picked up ready-to-paint ceramics and aren’t sure where to begin, a few fundamentals make the process far less frustrating. Understanding surface prep, paint types and basic techniques turns painting ceramics into something calm and enjoyable, instead of trial and error.
Jump to Section
- Ceramic Painting Techniques for Beginners
- Types of Paint to Use on Ceramics
- How to Paint Glazed Ceramics
- How to Paint Unglazed Ceramics
- How to Shade When Painting Ceramics
- How to Add Designs When Painting Ceramics
Ceramic Painting Techniques for Beginners
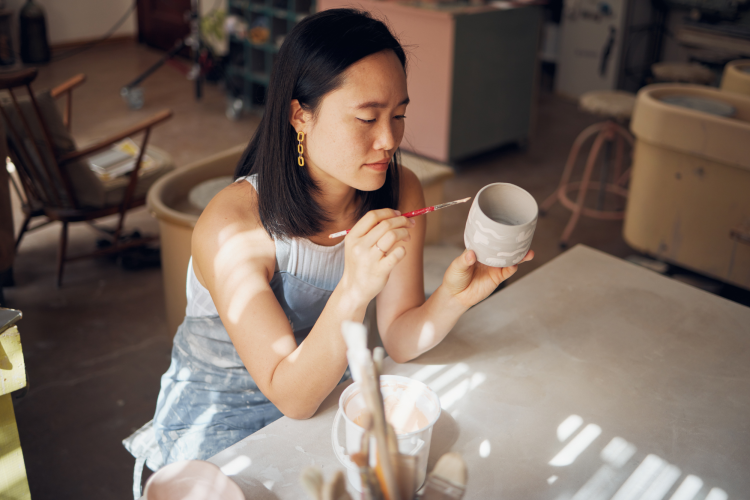
Pottery for beginners is often about slowing down and getting comfortable with the materials. When it comes to painting ceramics, that usually means learning how surfaces behave, how paint responds once it dries and how much patience actually matters.
If the goal is a piece you’re happy to use or unique pottery gifts, the best technique when it comes to painting for beginners is consistency — steady brushwork, thin layers and giving each step enough time to settle before moving on.
Try Pottery Classes

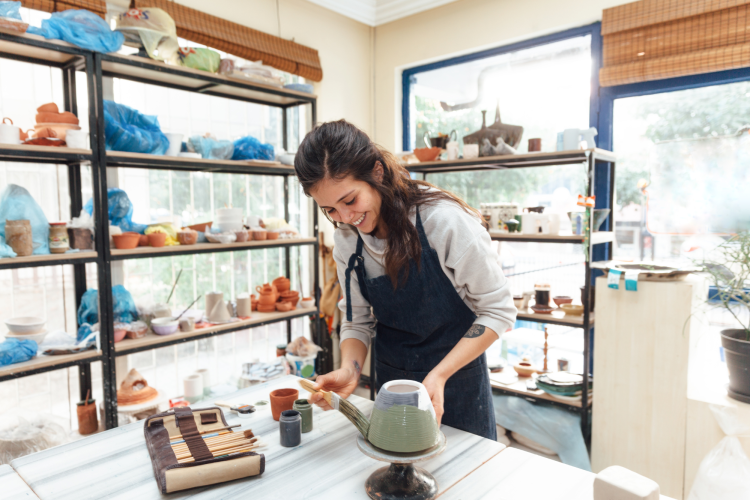
If you want to learn ceramic painting techniques for beginners, pottery classes are one of the easiest ways to shorten the learning curve and level up your skills. From working with clay to glazing pottery, expert artists will guide you through creating beautiful pieces, such as stunning vases and mugs.
Classes usually cover the full process, from surface prep to glazing, which makes it easier to understand why some pieces last and others don’t. They’re also a natural fit for group occasions, whether that’s a birthday, a casual get-together or a creative girls' night idea.
From pottery classes in Boston to Chicago and Houston, there are many exciting classes if you're looking for hands-on guidance. Wherever you’re located, there are plenty of engaging pottery classes near you. Even a single session can make painting ceramics feel far more relaxed the next time you try it at home.
Book a pottery painting class for a special occasion, such as a 50th birthday gift idea, sweet 16 party idea and other fun group events.
Types of Paint to Use on Ceramics
What kind of paint do you use on ceramics? It all comes down to knowing what paint will work best for your pottery painting ideas. Different paints behave very differently on ceramic surfaces, especially once glaze and heat come into play.
If you’re painting ceramics at home, these are the options that actually make sense to know.
Latex Paint
Latex paint is water-based and easy to work with, but it’s better suited to decorative pieces than anything you plan to use regularly. It has a thinner consistency and requires several layers of paint for a solid finish. It dries fairly quickly and comes in a variety of gloss options, making it workable for ready-to-paint ceramics that won’t see much wear.
Enamel Paint
Enamel paint is an oil-based paint that is far more durable when painting ceramics than most beginner options. It holds color well, cures hard and can handle higher temperatures when baked or fired.
This makes it a strong choice for glazed ceramics or pieces that need a smooth, glossy finish. The trade-off is cost and cleanup, which can be a bit more involved than water-based paints.
Acrylic Paint

Acrylic paint is often the easiest place to start when painting ceramics, especially on unglazed pieces. It's a versatile option that can be used on many surfaces.
Acrylics are chemical-based paints, but most brands are also non-toxic and flexible once dry; they do need to be sealed, though. Without a protective finish, acrylic paint won’t hold up to heat or heavy use.
Spray Paint
Spray paint is useful when you want smooth, even coverage without visible brush strokes. It works on both glazed and unglazed ceramics and is especially effective for base coats.
Because control is limited, it’s better suited for larger areas rather than detailed designs. A clear sealant is essential once the paint dries.
How to Paint Glazed Ceramics
Glazed ceramics already have a smooth, glass-like surface. That finish is great for durability, but not ideal when it comes to paint adhesion.
Glazing pottery involves firing ceramics in a kiln to create that glossy, finished look. The problem is that the same slick surface that protects the piece also makes it harder for paint to grip.
Because glazed pottery is so smooth, paint tends to slide, bead or chip if you apply it straight on. That’s why surface prep matters more than almost anything else when painting ceramics that have already been fired.
So what kind of paint works best on glazed ceramic? Enamel paint is your safest bet for a durable finish. If you want a more modern or decorative look, spray paint can also work well on fired pieces, as long as the surface is properly prepared.
With the right prep and paint choice, glazed ceramics can hold color beautifully and last just as long as the original finish.
Prepare Your Ceramic
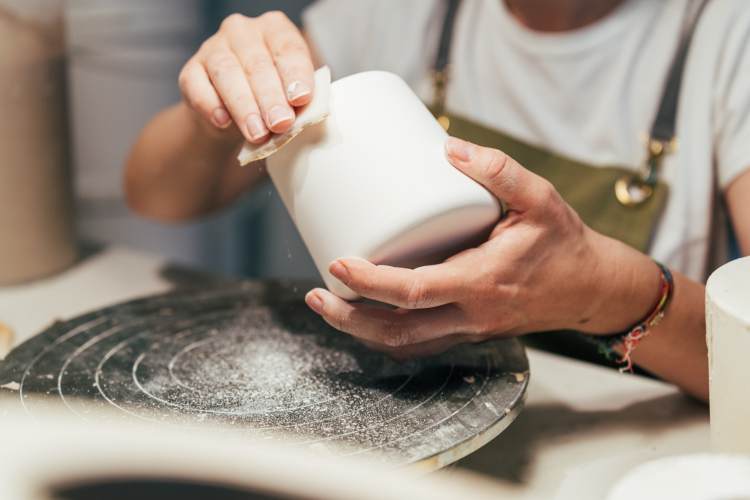
Before you begin painting ceramics, you’ll want to properly prepare your piece. Grab a sheet of sandpaper and rub it across your ceramic. This will eliminate some of the previous glaze and create a better surface for the paint to stick to.
After you finish sanding, remember to wipe off the dust with a clean cloth.
Apply Primer
Do you need to prime the ceramic before painting? Absolutely. Priming is what helps paint stay put on a glazed surface. A thin, even coat of primer creates a bridge between the slick glaze and your paint.
The primer, combined with the sanding method, will help the paint on your ceramic last even longer. Rushing this step is one of the easiest ways to end up with peeling later.
Paint Your Piece
The next step for painting glazed ceramics is the actual painting process. Use enamel paint or spray paint for the most reliable results on glazed ceramics. Apply paint in thin layers, keeping your brush strokes consistent and letting each coat dry before adding another.
Let Your Ceramic Dry
Once painted, allow the piece to air dry for several hours in a safe, undisturbed spot. Even if the surface feels dry to the touch, give it extra time before handling.
Reglaze

For pieces meant to last or be handled often, you can reglaze and fire the ceramic in a kiln or oven, depending on the materials used. This step isn’t required for decorative items, but it does add durability.
How to Paint Unglazed Ceramics
Unglazed ceramics are ceramics fired without a coating of glaze. They're more porous, which makes them much more forgiving when you’re painting ceramics for the first time. You'll find these types of ceramics, sold as ready-to-paint ceramics, make for some fun and simple ceramics projects for beginners.
If you’re trying to figure out how to paint unglazed ceramics, start with acrylic paint, as it absorbs into the surface instead of sliding around, so mistakes are easier to fix and layers build more naturally. And since most acrylic paints are also non-toxic, they're the better choice for mugs or bowls or anything you intend to use in the kitchen.
Prepare Your Ceramic
Before painting your beautiful pottery, ensure that your ceramic is clean and completely dry. Use a slightly damp cloth to wipe away any dust or dirt, then let it air dry. Skipping this step can leave tiny bits of debris stuck in your paint, especially on textured pieces.
Paint Your Piece

Next, select your desired colors and start painting your piece. The best method for painting ceramics is to place a small amount of paint on a palette. It will save you from any paint waste, and you can always add more to the palette while painting.
When painting unglazed ceramics, you can use a paintbrush or sponge to add a unique texture on your piece, but remember to let each coat dry before adding more paint.
Seal Your Design
End your painting process by using a clear acrylic spray to seal your piece. Acrylic paint cannot handle kiln heat, so sealing is what protects the surface and keeps colors from chipping or fading.
Use light, even sprays and let the piece cure completely before handling.
How to Shade When Painting Ceramics
Shading pottery is a beautiful painting technique that adds depth to your painted ceramics. Shading involves darkening or coloring with lines or blocks of color on your piece, which helps flat colors feel more dimensional and intentional. Even simple shading can make a mug, bowl or plate feel finished rather than decorative.
To properly incorporate shading when painting ceramics, the key is restraint. Subtle transitions tend to look more natural on ceramic surfaces than heavy contrast.
Prepare the Brush

First, you’ll dip your brush in water to create a smoother texture for your shading. Then, lightly dab it on a paper towel before applying paint to the bristles. You want the bristles slightly damp, not wet. This helps the paint glide instead of sitting in harsh lines.
Apply Paint on the Brush
Next, you’ll press the brush next to your paint color, with only one side of the bristles catching the paint. Shading requires intricate detail, so you’ll want to keep the paint on your brush to a minimum. You can always add more paint later.
Paint Your Piece
Use the side of the brush rather than the tip, moving in soft strokes along edges or curves. Let the brush do the blending as you go. Make sure you have enough water in the paintbrush to help it easily glide along your piece. If the color looks too strong, stop and let it dry before adjusting. Ceramic surfaces reward patience.
Shading is best used for lightly applying lines of color while painting ceramics.
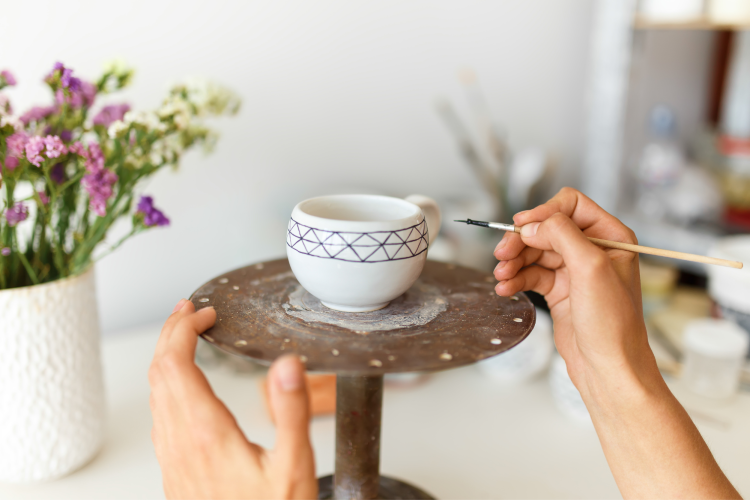
How to Add Designs When Painting Ceramics
Once your base layers are dry, adding designs is where painting ceramics starts to feel personal. This is the stage where simple choices often look better than complicated ones, especially on curved surfaces. But that doesn't mean you need to skip your cute painting ideas.
Just focus on clean lines and repetition, which tend to read more clearly when painting ceramics than overly detailed illustrations.
Choose the Right Tools

Flat or small round brushes work well for most designs. Flat brushes are useful for geometric shapes and borders, while round brushes give you more control for dots, leaves or simple florals.
Paint pens can also be helpful if you want consistency without worrying about brush control.
Paint Your Design
Take your time and work in light, even layers. Let each section dry fully before adding another, especially if you’re layering colors or details. Rushing is the fastest way to smudges and uneven coverage.
Painter’s tape or stencils can help create clean edges, straight lines or defined sections. Press them down gently and remove them slowly once the paint has set to the touch to avoid lifting color underneath.
If something doesn’t look right, resist the urge to fix it while it’s wet. Wet paint almost always spreads or lifts, making small issues bigger. Once it’s dry, you can touch up edges, add another layer or refine details with much more control.
This slower, step-by-step approach gives you cleaner lines, smoother color and a finished piece that looks intentional rather than rushed.
Finish Your Piece

After painting your base color and unique design, let your beautiful piece air dry. Then, if you painted on glazed pottery, make sure to bake it in an oven or kiln to help your piece last even longer. If you painted on unglazed pottery, make sure to use an acrylic sealant to protect your design.
Painting ceramics doesn’t need to be complicated to be rewarding. Once you understand how different surfaces and paints behave, the process becomes far more relaxed and enjoyable.
With the basics in place, painting ceramics is less about getting everything perfect and more about taking your time and making something you’ll actually want to keep. And that’s usually when it stops feeling like a project and starts feeling like a hobby.
For even more fun pottery ideas, check out other experiences happening on Classpop!