A Comprehensive Guide to Glazing Pottery for Beginners in 2026
Glazing pottery might be the most exciting part of the whole pottery making process. It’s the final step that adds color and shine to your project, bringing out dimensions of your design that wouldn’t be seen otherwise.
With so many pottery variations possible, does pottery need to be glazed? It depends on the type of project you’re working on. Raku, bisqueware and earthenware are all types of pottery that remain unglazed in their finished state.
But if you’re aiming for a food- and water-safe piece like a mug, plate or vase, knowing how to glaze pottery as a finishing step is a must. Fortunately, there’s a variety of methods for glazing pottery ceramic pieces. One of them is sure to work for you!
Jump to Section
- How Do You Glaze Pottery for Beginners?
- What is Glazing Pottery?
- Pottery Glaze Types
- How to Glaze Pottery Without a Kiln
- Advanced Pottery Glazing Techniques
- Pottery Glazing Ideas
How Do You Glaze Pottery for Beginners?
When it comes to pottery for beginners, glazing pottery is an essential part of the process. Learning how to glaze pottery is included in early instruction to make sure you know how it’s done, even if you experiment with unglazed pieces later.
Try Pottery Classes

When you sign up for local pottery classes, you’ll be taught by instructors who can help you learn the glazing process and determine how it might work best for your projects. Taking pottery classes is an ideal option for learning all phases of the pottery making process. They’ll also open your eyes to all the possibilities that exist for glazing pottery.
What is Glazing Pottery?
Pottery Glaze Materials

Glazing in pottery involves coating porous kiln-fired pieces called biscuit pottery with colored liquids, called glazes. Glazes can be applied in a variety of ways to achieve almost any effect you can imagine. They’re available in a spectrum of colors, and some even include metallic elements that add extra sparkly magic to your pottery.
The type of glaze you choose for glazing pottery in the kiln-fired method determines the temperature for the final firing of your piece. This ensures the materials in the glaze are heated sufficiently to melt and fuse to the pottery.
They become solid and shiny, like a layer of glass painted over your piece. The materials within the glaze are, in fact, glass, which explains the incredible sheen you can achieve when glazing pottery. You can learn to make your very own DIY potter's kiln at home if you have the space and time.
Pottery Glazing Processes

There are various processes involved in glazing pottery, providing an array of finished effects. According to the American Ceramics Society, some of these processes date all the way back to 3000 BCE. The easiest process for glazing pottery involves painting glazes onto your piece using paint brushes, sponges or other handy pottery tools.
This allows you to treat your pottery piece like a canvas to experiment with color blends, patterns and special effects applied to different areas. You can create gradients where one hue transitions smoothly into another. You can also paint shapes, designs and motifs on your piece.
Clear glaze can be painted over colored glazes to cover any areas that might not have been painted. This is crucial in making sure your vessels are water- and food-safe when glazing your pottery.
Top tip: Remember to add your very own valuable pottery mark before you glaze.
Pottery Glaze Types
Ceramic Glaze

Ceramic glaze is the most familiar pottery glaze type. It’s the glaze you commonly see on usable ceramic pieces like mugs, dishes and vases. But if pottery pieces themselves are also referred to as ceramics, you might then ask, “What is ceramic glaze made of?”
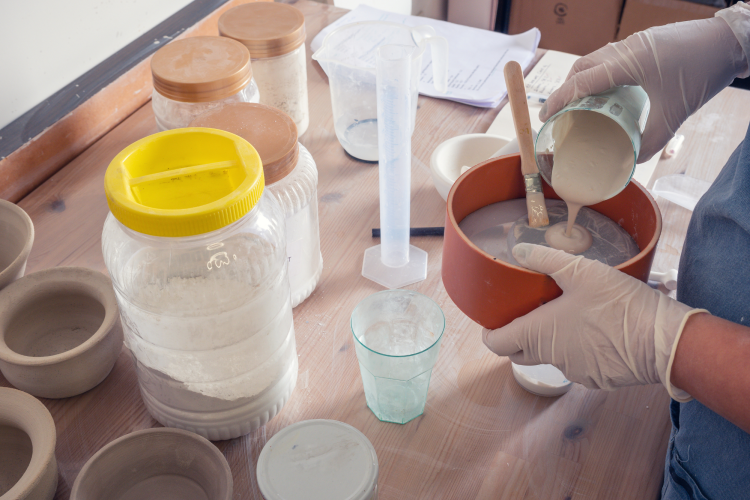
Ceramic glaze consists of glass powder suspended in water, which you create as part of the process to control thickness and color concentration. When glazing pottery with ceramic glaze, you’re coating fired clay with liquid glass. This coating melts smoothly when fired in the intense heat of the kiln and becomes a permanent layer on the piece. Trying your hand at glazing makes for a great ceramics project for intermediate-level potters.
Pottery and ceramic studios everywhere use ceramic glaze to achieve vivid colors and a spectacular glassy sheen. There’s a reason it’s so popular for glazing pottery!
Slip

Slip is a way of glazing pottery using watered-down clay, called slurry. Thin layers of slip are added to unfired clay, either in patterns or smooth strips. Sometimes the slip is scratched away to expose the colors underneath when the piece is fired.
It’s an effective process for glazing pottery that can give your piece a distinctive feel, different from ceramic glaze. Slip can also be piped onto pottery to create a raised, textured design that stands out from the surface of the piece.
This process for glazing pottery is common enough that you’ve most likely seen examples, even if you didn’t realize how it was created!
Underglaze

Underglaze is another process for glazing pottery that lets you add layers of color and dimension to the surface of your piece. Like slip, underglaze is clay thinned with water, but it contains pigments and textures that behave more like paint than other glazes might. This means better control when applying your designs.
You can add underglaze to your pottery during the bisque stage, then add clear ceramic glaze over it before firing for a complex design with a stellar shine.
How to Glaze Pottery Without a Kiln
Acrylic Paint

With so many glazes requiring a firing process, can you glaze pottery without a kiln? It may seem like a trick question, but the answer is a resounding yes. In fact, glazing pottery without a kiln is a much easier process!
The simplest way to glaze pottery without a kiln is to apply acrylic paint as you would ceramic glaze. Acrylic paint comes in an incredible array of shades and hues, dries quickly and cleans up easily with water.
You can use the same application process for glazing pottery with acrylic paint as for ceramic glaze. Be sure to seal the surface of your pottery first with a clear spray or brush-on sealer to keep the paint from absorbing into the porous, hardened clay.
Once dry, you can apply a clear coat over your glazed piece using a sponge brush or sprayer to give your piece an even, protective sheen. Remember, when working with glazes, it's even more important to know how to clean paint brushes properly, as once set, a glaze can easily render a brush unusable.
Latex Paint

Latex paint is a handy way to give your piece a pop of complementary color without needing a kiln. This comes in handy if you’re trying to coordinate your project with your existing décor when glazing pottery.
Latex paints are tricky when brushed on and can leave streaks and brush marks when they dry. For best results, use a roller, sponge or sponge brush to apply latex paint.
This type of paint can also be layered if your project requires two or more tones. Be sure to apply a spray-on topcoat to bring the colors to life and fully seal the piece.
Spray Paint

Simple cans of spray paint may be the most versatile way of glazing pottery without using a kiln to fire your project. Spray paint colors are vibrant and easy to apply; you can cover your project with a few coats or experiment with layers, metallics and more.
It’s safest to test your pressure and distance before applying spray paint to your piece as a method for glazing pottery. Spraying too close or too hard can cause ripples and drips that make your finish appear sloppy.
As with acrylic and latex, be sure to add a layer or two of brush- or spray-on clear coat to finish your project properly and make your colors come to life! When all is said and done, you may find yourself a bit of a mess. Luckily, we've created this guide on how to get spray paint out of clothes.
Advanced Pottery Glazing Techniques
Dip Glazing

Dip glazing allows you to dunk your fired pottery into a container filled with prepared ceramic glaze. This is a great method for glazing pottery when a thoroughly smooth finish is the goal.
There are no brush strokes to control, and when done by a steady hand, there are no stray drip marks to mar the finish. Dip glazing also allows for layered designs, achieved by re-dipping dry pieces in second and third colors while tilting or turning the piece or otherwise manipulating the dipping process.
Drip Glazing
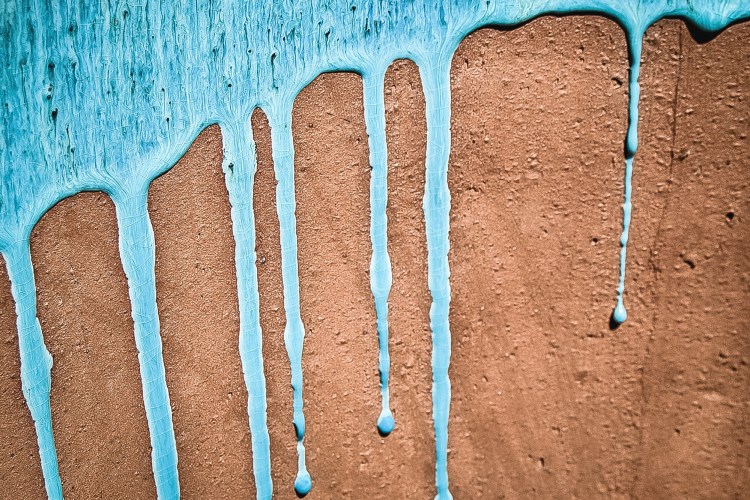
When you’ve mastered the basics of glazing pottery, you can try drip glazing, a fun way to add interest to your pottery pieces.
With drip glazing, glaze is applied using a squeeze bottle to control individual drips, drops and streaks that cover the surface of your piece. Sometimes a bit of tilting and tipping is required to make sure the drips go where you want them to.
It may seem very straightforward as a glazing method, but it can take a bit of practice on test pieces to develop the right touch and achieve the effects you’re hoping for.
Sponge Glazing

Sponge glazing is a technique for glazing pottery that lets you blend colors smoothly into one another. The result is a soft marbleized finish with areas of more severe texture scattered throughout.
Sponge glazing is a great method for achieving natural stone effects that mimic granite, shale and other types of stone. It’s also perfect for creating a feathery blend between colors that brushes may not be able to handle.
Natural sponges, like sea sponges, have organic textures and shapes that work best for this process. Using a kitchen or bath sponge can result in a heavy-handed effect with splotchy colors that don’t blend as desired. But if your goal is to experiment and see what fun textures you can create, any sponge will do!
Pottery Glazing Ideas
Splatter

If you’re feeling adventurous, why not try some splatter painting when glazing pottery? Prepare thinned-down ceramic glazes in colors you love, dip brushes in and whip the glazes onto your piece one hue at a time.
Be sure to let each layer dry and add a clear coat when finished. You’ll end up with a dynamic pattern that lends vibrant energy and explosive blasts of color to your pottery.
Best of all, this process doesn’t require much practice to master. In fact, the less structured you are, the more fascinating your splatter glaze will be!
Graffiti

Drip glazing in vivid colors gives your pottery an edgy graffiti-style look that brings a street art element into your work. If you’re using traditional glazes for glazing pottery in this way, try vivid neon colors against a black underglaze to electrify your piece.
Add elements of splatter and drip glazing to make the design even more complex. You can also use brushes to include more refined details, lettering, images and more.
There’s no restriction on what you can add. You’re able to introduce the free-spirited pop element of urban art into your piece and create something bold and unique!
Folk Art Patterns

Applying folk art patterns to your pieces will put you in the mindset of early potters and their methods for glazing pottery.
To begin, find a folk style that suits your abilities. There are many aboriginal motifs, native patterns and familiar European designs that can be printed and traced onto your vessel.
Be sure to prepare with underglaze before tracing your pattern. Then, use paint brushes, dotting tools and other utensils to apply your folk-style designs. This technique works best with a little practice.
Use the glazes or paints you intend to work with, patterns traced onto practice tiles first. With a bit of exploration and testing, you’ll learn to build up layers and recreate strokes that achieve the look you’re going for.
The possibilities for glazing in pottery are as diverse as the artists using them. There’s a technique and a medium for every beginning potter’s taste and imagination.
Each method allows you to grow, learn and experiment with the other techniques whenever you’re ready. After all, experimenting to add exciting effects to your finished pieces is what glazing pottery is all about! Follow these American Potters on Instagram for more inspiration.
For even more creative ideas and inspiration, check out other experiences happening on Classpop!