Wheel Throwing 101: A Potter's Guide
Anyone interested in creating three-dimensional art pieces will love trying pottery made using the wheel throwing method. It’s an artform that literally requires you to get your hands dirty while building something beautiful and functional. It’s also an important vehicle for increasing your sense of personal joy by doing something creative.
Have you ever wondered what it takes to start wheel throwing? Does it seem too technical an art for you to try? According to the University of Colorado, most ancient Greek pottery was made on a potter's wheel. Like any other art form, all it takes is a bit of instruction and some practice to learn the basics. Once you know the fundamentals of wheel throwing, you can experiment with more sophisticated pottery throwing techniques. The guide below will introduce you to important concepts and techniques.
Jump to Section
- How to Learn Pottery Throwing
- What is Wheel Thrown Pottery?
- Wheel Thrown Pottery Kick Wheels
- Wheel Thrown Pottery Techniques
How to Learn Pottery Throwing
Getting Started
Aside from becoming familiar with your materials, there are no prerequisites for learning wheel throwing. If you’re a creative self-learner, you can teach yourself wheel throwing pottery simply by experimenting with clay on a wheel in a studio in your city. Though it’s different from hand-formed pottery or pottery built from slabs of clay, it doesn’t take long to get a feel for wheel throwing once you’ve started. The good news is, even if you make a mistake and collapse your piece while trying it out, you can re-center your clay and start again to build your clay sculpture masterpiece.
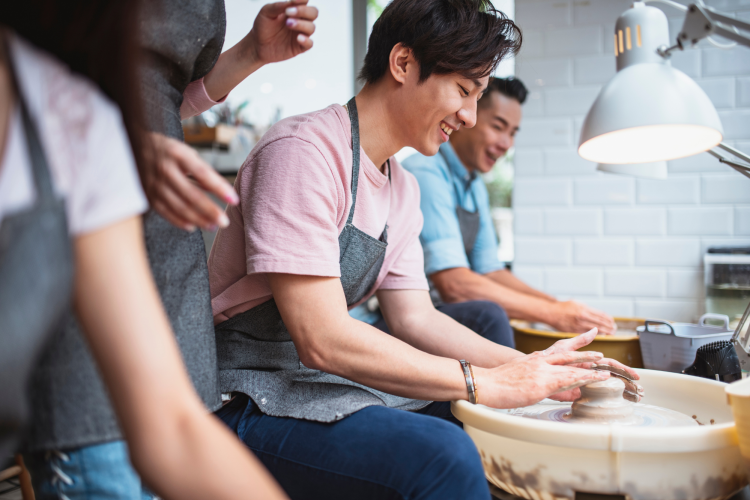
It’s easy enough to seek out an instructor, like those teaching pottery classes in San Francisco. The city is a hotspot for fine art like pottery and ceramics. Pottery classes in San Diego also provide the opportunity to learn from a seasoned instructor while finding your rhythm with wheel throwing. If you’re not in these areas, browse pottery making classes near you, and you'll be on your way to becoming a pottery throwing pro!
What is Wheel Thrown Pottery?
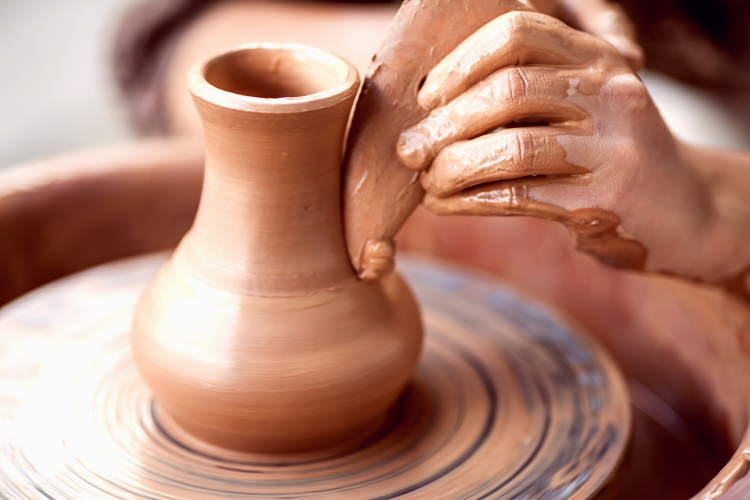
Don’t let the name “wheel throwing” fool you; aside from initial slamming of clay to make it stick, there’s no actual throwing involved in creating wheel thrown pottery! It’s simply a term that means pottery created on a potter’s wheel. The word was likely chosen due to the original definition of the archaic word “thrawan”, which translates to the “twisting” of the wheel and is the origin of the modern word “throw.” Regardless, it’s fun to say you’re throwing pottery, even if you’re just spinning it on a wheel! Wheel thrown pottery results in smooth rounded or cylindrical shapes using the spinning motion of the wheel. Wheel throwing is an essential process for producing evenly formed pieces when creating medium- and larger-sized vessels.
Choosing a Project
Once you have a feel for pottery throwing, you can decide what you want to create. Your original pinch pots and coil projects can be models for something larger and more impressive. A trip to a gallery or art store in your area will provide tons of inspiration. Look for pieces that inspire you, items that you’d love to own or give as gifts. If you’re allowed to hold them, feel their weight in your hands and take notice of the finish; is it rough like earthenware or glazed smooth? Pay attention to its function, too. Something meant to hold water like a vase needs a different finish than a decorative piece. This will help you decide what materials you’ll need for your wheel throwing. Be sure to take notes so you’ll remember your experience but refrain from copying anyone’s design outright. It should serve only as inspiration since you’ll want your pieces to be as original as theirs!

Wheel Thrown Pottery Kick Wheels
Modern electric clay pottery wheels are equipped with a foot pedal that allows you to operate the motor without moving your hands off the clay. But this isn’t the same as wheel throwing with a pottery kick wheel. With pottery kick wheels, you control the speed and motion of the pottery wheel with the power of your feet. A large wheel at the base of the machine spins the table at the top when you push your feet against it. You can achieve various wheel throwing effects while by speeding up or slowing down the wheel. It’s something of an athletic activity that keeps your legs moving while you work, giving you a bit of a cardio blast!
Wheel Thrown Pottery Techniques
Clay Preparation
Because the clay uses in wheel throwing comes in a firm block, you’ll need to condition it before starting. This means kneading it in a process called “wedging” to make it soft and remove any bubbles or air pockets. Once your clay is of an even consistency, it’s ready to be thrown.
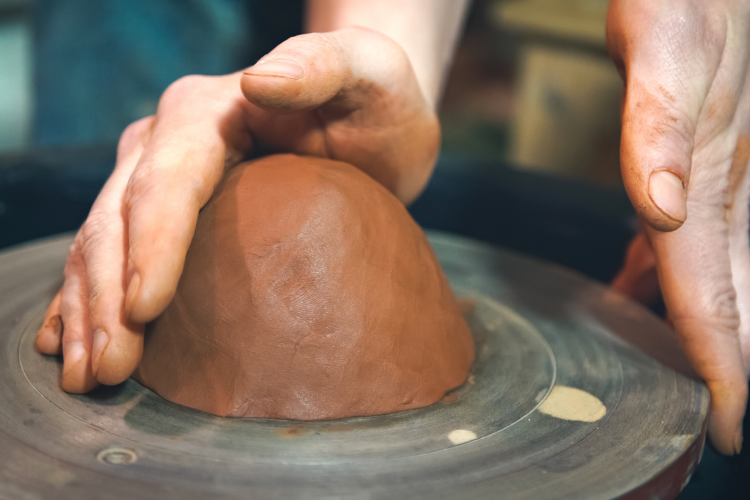
Centering
In wheel throwing, centering is the process of adhering your clay to the center of the pottery wheel. Form your clay into a ball and slam it onto the wheel to make it stick. You can spin the wheel while gripping the clay with your hands to adjust your centering and build your clay into a cone before you begin forming.
Opening
After the clay has been centered and coned, you can press your fingers into the top of the mound to form a divot in the clay. Careful — even pressing will spread the divot until the clay becomes a hollowed-out tube. This process may take some time, as the thinning clay can vary in thickness depending on the amount of pressure you apply. Find your way by feeling the clay and determining how to hold your fingers on the inside and outside of the cylinder as you press. When the clay at the base is about 1/3 of an inch thick, the clay is opened and you’re ready for the pulling and bending phase of wheel throwing.
Pulling and Bending
Pressing your wet hands against the clay as it spins and pulling upward thins the clay and allows you to create taller, more cylindrical forms. Bending the clay with your fingers moves the ridge at the top of the cylinder downward into more rounded forms or upward into more open forms. You can experiment by making your piece thinner at the base and broader at the top or wider in the middle and narrow at the top. There are unlimited possibilities for forms you can create by pulling and bending the clay while wheel throwing pottery.
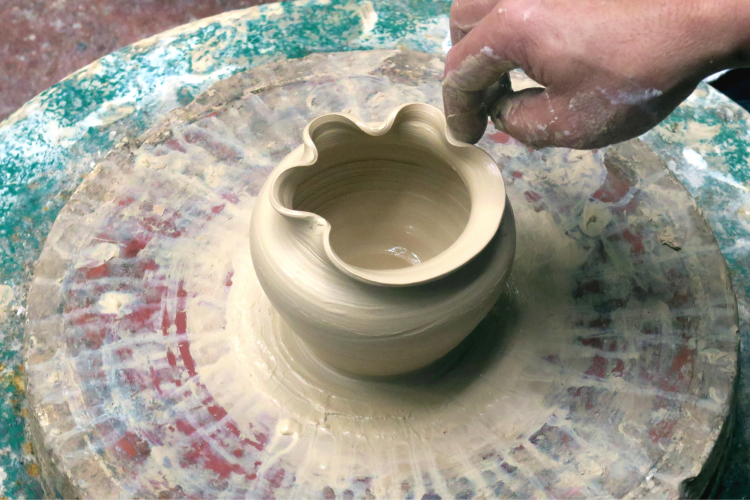
Collaring
Collaring allows you to add characteristic details when wheel throwing a piece with a narrow opening like a jug or a bottle. The neck of your pot can be left wide if you’re making a cup, mug or cylindrical vessel. But to create more elegant details in your piece, you can create a collar by gently squeezing and bending the clay to form a curved lip. Experiment with collaring to find a design that suits you and your aesthetic.
Coiling
Another common thrown pottery technique for creating sturdy vessels is the coiling method. It’s a great process for crafting larger pieces when wheel throwing. This process begins with clay rolled into a long snake that you wind around a flat clay base. Slowly adding more coils to the piece and pressing them together will bring it to the height and width you desire. Once you have a coiled vessel shape, you can smooth out the grooves and make the walls solid by turning the potter’s wheel and dragging tools or damp sponges to seal the coils together. This allows you to control the curve of the piece, as well as the thickness of the walls. After you achieve the desired shape and smoothness, you can use pottery tools to create grooves, notches and designs to make your piece more intricate.
Cutting, Drying, Glazing and Firing
Though the wheel throwing process only includes the steps listed above, the pottery process requires a few finishing steps. When your piece has been fully thrown, you can release it from the potter’s wheel by dragging a length of wire through the base and cutting it free. Depending on the type of pottery you’re making, you’ll want to let it dry thoroughly before applying glazes to finish them. Glazes are created by blending powdered glass with water. Once applied, the glazed piece can be fired in a kiln to a temperature that corresponds to both the clay and the glaze. This melts the glass in the glaze, which hardens as it cools to a stunning finish. And after your piece has been fired, the only step left in the wheel throwing pottery process is finding your creation a place of honor for it in your home!

Learning the process for wheel throwing pottery gives you an incredible sense of accomplishment. You’ll become capable of creating three-dimensional works that change and expand before your eyes. You’ll be thrilled as they turn into handcrafted pieces you’ll love or give as treasured gifts. Once you start creating your own unique pottery pieces on a clay pottery wheel, don’t be surprised if you’re inspired to produce an entire collection.
For even more creative ideas and inspiration, check out other experiences happening on Classpop!