Everything You Need to Know About Making Clay Pots

How easy is it to get started with clay pot making if you’ve never tried pottery before? It's as easy as working with modeling dough like you used as a kid! Clay pot making is one of the easiest projects to tackle when learning the art of pottery. Not only are there limitless clay pot ideas to suit any skill level, the simple shape of a clay pot is also one of the most rewarding three-dimensional forms to create. By building up walls of clay around an empty space, you experience a profound holistic art process with clay pot making that other art forms simply don’t offer.
Additionally, The Conversation reports the scientific discovery that people who excel at divergent thinking for real-world tasks “report having more creative hobbies and achievements.” So clay pot making isn’t just a great creative outlet; it also helps broaden your mental capacity in general — not to mention how fun it is to get your hands dirty while working with clay! Depending on your creative ambitions, your clay pot making can be as simple or as complex as you choose. The guide below describes the various methods used in clay pot making to help you determine which technique is right for you!
Jump to Section
How to Make a Clay Pot
Attend a Pottery Making Class
There are several approaches to clay pot making, each with its own merits and challenges. You may find wheel throwing on a potter’s wheel more satisfying than hand building pottery. You may find clay pot making using slabs of clay most appealing. Or you may stick with the coil technique when figuring out how to make a clay pot for yourself. Whichever method you choose, your clay pot making will be much more successful with an instructor guiding you.
By signing up for pottery classes in San Francisco and pottery classes in San Diego, you can develop your pottery making skills using a variety of methods and sculpting tools. And you’ll have a skilled pottery teacher sharing tips and tricks and helping you learn the clay pot making techniques that interest you most. There are courses all across the country that get you started. Check into pottery classes near you to find one in your area.

Hand Building
The hand building pottery technique is the simplest and most straightforward method. The name says it all: you build your vessels by hand, forming the clay in lumps, strips or coils and building up walls that you press and shape using the force of your fingers and a selection of tools. You can make any size pot you like with the hand building method, though it’s best to begin with small pots to get a feel for the technique.
Pinching is a great hand building method for getting started with clay pot making. All it takes is pinching and pressing a lump of clay into the proper shape and size. As your pots become larger, you can experiment with clay coiling, or wrapping rolled-out lengths of clay into circles to form your pot. You can also create clay pots using rolled-out slabs of flattened clay that you cut into shapes that form the walls of your vessel. This method requires a bit of precision to ensure the walls are of equal thickness and that their joints adhere properly.

Wheel Throwing
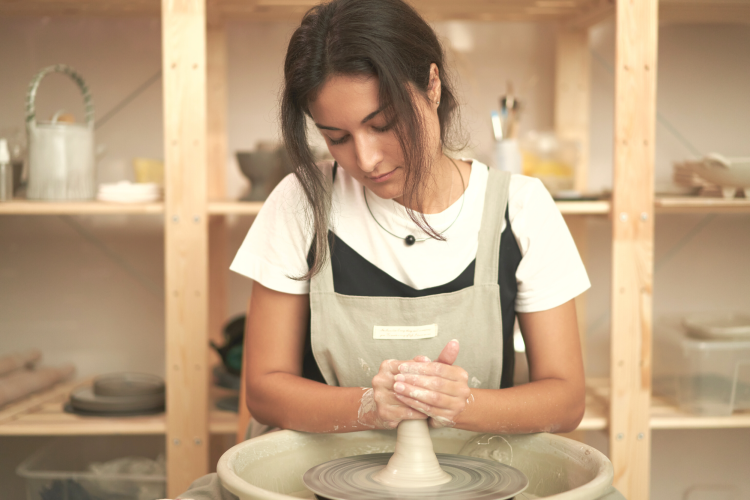
With the wheel throwing method of clay pot making, the circular motion of a potter’s wheel helps your creations take shape. This is especially helpful when creating rounded vessels such as bowls, urns and pitchers. Potter’s wheels can be worked with an electric pedal or manually kick-operated. The pot begins as a mound of clay that’s worked wet and built to a pillar before being hollowed out and shaped using the finger-and-knuckle technique. Because it can be tricky to get the hang of working with spinning clay, wheel throwing is the most advanced of the clay pot making methods. Be open to trying it once you’ve conquered the hand building method. You might find you have a natural talent for it!
Clay Pot Making Techniques
Pinch Pots
Pinch pots are the simplest and quickest hand-built vessels you can create when clay pot making. It’s a great process for pottery for beginners and younger potters, since it requires no tools other than your fingers. The easiest way to create a pinch pot is to start with a ball of clay that fits in your palm. Press your fingers into the center to begin hollowing it out. Gradually spread the pot wider, thinning the walls by pinching the clay as you work.
Be sure to keep the walls an even thickness all the way around to avoid producing a crooked pot, or one that might crack when drying. A miniature version of a pinch pot, called a thumb pot, can be created with a smaller ball of clay. Simply press your thumb into it to form the walls and smooth the surface. Once you have these techniques down, you can churn out whole sets of pinch pots in no time!

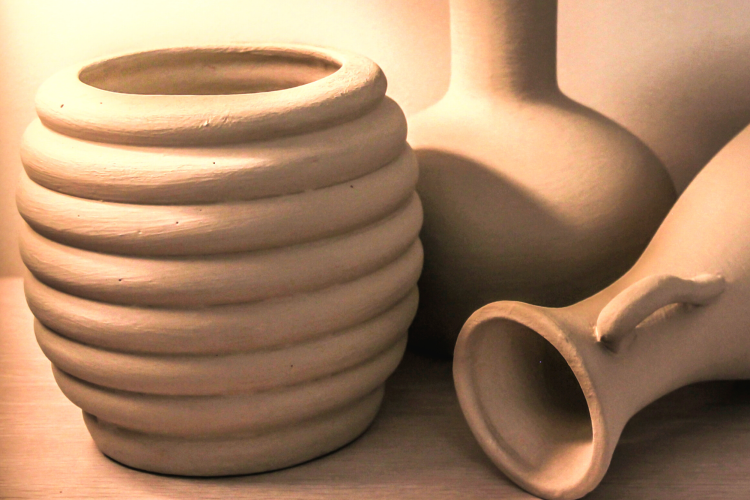
Coil-Built Pots
To build a coiled pot, press a simple starter base using the pinch pot method. Then, roll out evenly sized snakes of clay and begin winding them around your base. Press them together firmly as you expand the shape of your vessel to make sure they adhere. Once you have the size and shape established, smooth the interior and exterior walls using your wet fingers, sponges or other pottery tools, until your pot is smooth and solid.
Once your pot shape is complete, you can experiment using carving tools and blades to scratch or dig patterns and designs into the outer surface of your pot. This extra detail can bring an impressive element of design and elegance to your clay pot making.
Slab-Built Pots
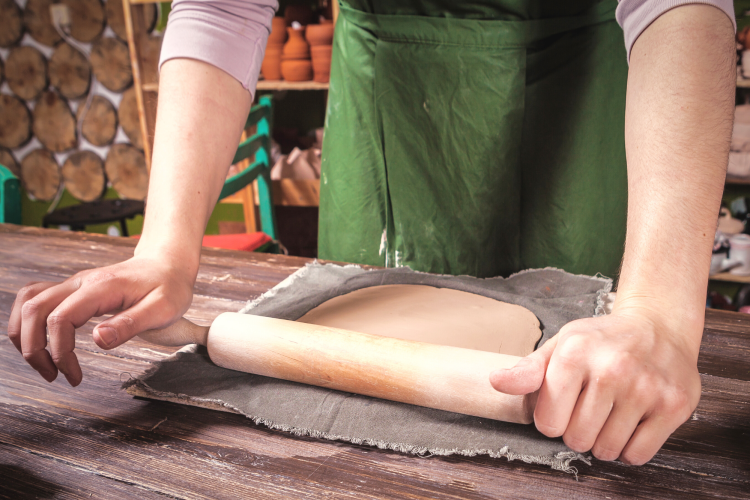
When using the slab method of clay pot building, you’ll use a rolling pin to roll out flattened widths of clay to serve as the pre-formed walls of your vessel. There are wooden guides that allow you to roll slabs of equal thickness from every side to ensure your clay pot is even from all angles. To create a cylindrical pot, wrap your slab into a cylinder and seal the edges by applying water and smoothing the seam.
Slab building is an excellent method for achieving great height in your clay pots. You can also use linear geometric shapes as your forms if you prefer. Square, triangular or diamond-shaped pots are all possible with slab building, adding dramatic flair to your clay pot making.
Wheel-Thrown Pots
Wheel throwing adds an element of fun by introducing you to the potter’s wheel! In this method, you begin with a mound of clay thrown onto the wheel. To build your vessel, wet your fingers and wrap your hands around the mound, squeezing it upward as you center it. Once the mound spins without wobbling, you can press your fingers into the center and begin widening the vessel into a pot shape. Using your knuckles and fingertips, spread the clay outward to widen your pot as you pull upward to increase its height.
Depending on your intended design, you can bring the walls straight up for a linear vessel or create a more bulbous belly-shaped pot by letting it bow outward in the center. There’s really no wrong way to produce a pleasing piece with wheel-thrown clay pot making — as long as the clay doesn’t collapse!
Clay Pot Ideas
Vases
The freedom of creating vases with clay pot throwing allows you to experiment with the height and width of your vessels. A simple tube formed with coils or thrown on a wheel can be given elegant curves or a very geometric line, depending on what appeals to you. It can also be formed with a thinner neck to create a bud vase or with a wider opening to accommodate a bouquet. Imagine having a variety of vases you’ve created yourself sitting on your shelves!

Flowerpots
Similar to vases, flowerpots can be formed in any shape and size you can imagine. Create a collection in ascending sizes to arrange on a windowsill or practice adding whimsical designs like faces or animal shapes with additional clay on the outer surface. You can glaze your flowerpots in bright, cheerful colors to add to your garden, patio or front porch for a bit of handmade home décor pizzazz!

Urns
Urns are simple jar shapes with a rounded belly and a lid on top. They’re a great way to take your clay pot making to a higher level of skill and presentation. They’ll also give you practice creating coordinating lids in your clay pot making, a tricky endeavor when it comes to size and shape. These are lovely in arrangements of varying sizes sitting on your countertop or dinner table. When finished with food-safe glazes they can serve as sugar bowls, spice dishes and other food storage vessels.

All clay pot making methods require trimming, smoothing, drying and firing to complete the process. Depending on your intended design, glazes and oxides can be added to give your clay pot ideas brilliant finishes and colorful touches of magic that bring your imagination to vivid, vibrant life. This also makes your pieces waterproof and food-safe, perfect for use in the kitchen or garden.
It’s easy to build your clay pot making skills by starting simple and adding to your technique. But there’s no requirement to learn every technique. If you find one that works better for you than the others, you can happily continue your clay pot making with that method for as long as you like. By experimenting with variations in size, shape, design and glaze, you can create an endless array of beautiful pieces that satisfy your creative itch for clay pot making. Plus, you’ll be producing a stunning collection of pieces for your own enjoyment or to give as treasured handmade gifts. Follow these American Potters on Instagram for more inspiration.
For even more creative ideas and inspiration, check out other experiences happening on Classpop!