69 Creative Hobbies You Can Feel Good About Trying in 2026

Creative hobbies are having a moment, not just because they are fun but because people are realising how much better they feel when they make something with their hands or their minds. Cooking, painting, fixing things, filming makeup videos, arranging flowers, building digital worlds: it all counts. And it all helps.
A recent poll from the American Psychiatric Association found that almost half of adults turn to creative activities to reduce stress or anxiety, and people who report stronger mental wellbeing tend to engage in creative hobbies more often.
Creative hobbies are not just ways to fill time. They help regulate mood, help focus the mind and give you a break from constant digital noise. Some may even grow into side hustles; here's hoping.
Jump to Section
- What Is a Hobby?
- How to Find a Hobby
- Creative Hobbies for Adults
- Creative Hobbies for Teenagers
- Creative Hobbies to Do at Home
- Creative Hobbies for Non-Creative People
- Creative Hobbies That Make Money
- Unique Creative Hobbies
- Outdoor Creative Hobbies
- Musical Hobbies
What Is a Hobby?
A hobby is simply something you choose to spend time on because it feels good to do. It’s the thing you reach for when you are off the clock and want a shift in energy, not another task. It becomes a hobby when you return to it often enough that it starts to feel familiar and part of your life.
Most people think hobbies have to be impressive or productive, but they really just have to be enjoyable. They can involve learning a skill, exploring an interest or just making space for something that lets your mind settle.
Creative hobbies fall into that space where enjoyment meets expression. You are not performing, meeting a deadline or proving anything. You are giving your brain room to think differently, make connections and explore ideas that rarely show up in your day-to-day routine.
When you find something you enjoy doing, you’ll quickly find yourself doing it for fun in your free time, likely without even having to think about it and before you know it, you’ll have picked up a new hobby.
What’s a Creative Hobby?

A creative hobby is any leisure activity that requires you to think or express your ideas, experiences or emotions in a unique, engaging or creative way. This could include traditionally creative interests.
If you're wondering, "What are creative interests?" they are activities that involve imagination, self-expression, and the creation of something new or original. They include things like art and music, or even playing chess, designing a virtual world or woodworking.
Creative interests become creative hobbies when your practice becomes habitual.
Why are Creative Hobbies Good?

MIT Libraries shares its findings on the positive connection between creative activity and improved productivity and work performance. This means that creative hobbies have many benefits. So yes, picking up new creative hobbies just might benefit your professional life too.
Engaging in creative hobbies is often very relaxing and has been used to help treat stress, depression and other mental health conditions. These types of activities are also great for your mind. They challenge your brain to think in new and different ways, which can help boost your overall cognitive function and even improve memory, according to the National Library of Medicine.
What Hobbies Can Make Me Creative?
Hobbies themselves don’t necessarily make you creative, but having a creative hobby will help you explore and develop your creativity.
A hobby defined as creative means that it’s an activity that requires you to think differently and express yourself in new ways; in other words, a creative hobby encourages your creativity. So, if your goal is to boost creativity, then adopting a creative hobby is a great first step.
How to Find a Hobby
How do you find creative hobbies? Finding a creative hobby usually starts with curiosity, not commitment. You try something small, see how it feels and follow the pull from there. Most people expect a hobby to arrive fully formed, but it often begins with a moment of interest that grows only when you give it a little time.
Tip: Remember the hobby definition — it needs to be an activity you enjoy doing, and the only way to find fun activities you like is by actually trying them!
A good way to discover what fits is to notice what you already enjoy in your day. If you like details, you might gravitate toward crafts. If you feel calm when you cook or garden, a hands-on hobby may come naturally. If you like learning for the sake of it, writing, music or digital creation might feel familiar even before you start.
It also helps to learn from people around you. Joining a friend for their favourite activity or trying a beginner class can make the whole thing feel less abstract. Online videos can spark ideas too, but the real insight comes when you step in and try it yourself. Watching someone do something is not the same as feeling how it shifts your own attention and energy.
A hobby should feel like something you want to return to, not something you have to keep up with. When an activity makes you feel more focused, more relaxed or more like yourself, that is usually a sign you have found one worth keeping.
Finally, what are some creative hobby ideas? We’ve compiled an extensive list to inspire you, and there truly is something for everyone.
Creative Hobbies for Adults
Adults tend to choose hobbies that help them unwind, learn something new or balance out a busy schedule. Whether you’re someone who enjoys hands-on projects, artistic expression or calming routines at home, these creative hobbies give you space to switch gears and feel more grounded. Many adults pick them up for different reasons, which is why searches for creative hobbies for women and creative hobbies for men often overlap more than people expect.
1. Mixology and Bartending

Shake things up happy hour style with online mixology classes and learn how to mix the absolute best cocktails. Pretty soon, you’ll have your own at-home bar and be creating your own unique crafty drinks.
From the popular vodka, tequila, bourbon and whiskey-based cocktails to tropical rum and mezcal cocktails or the standard gin cocktails, there is actually a whole lot to learn. Yup, this is one of the more inventive, creative hobbies out there, especially when exploring local ingredients to add to your concoctions.
2. Wine Sommelier

With these flavorful, creative hobbies, there are all sorts of virtual wine tastings to help you build your sommelier knowledge or simply introduce you to new blends and vintages.
3. Flower Arranging

There is something so peaceful about creating beautiful bouquets bursting with blooms and greenery. Virtual flower arranging classes will send you all the flowers and tools you’ll need and guide you through the process of creating curated arrangements.
4. Baking

The combination of having clear steps to follow and having to use your hands makes baking one of the more relaxing and grounded creative hobbies for many people. Plus, you end up with all kinds of delicious baked goods to enjoy either by yourself or with friends and family.
5. Pottery Classes

One of the most engaging creative hobbies is pottery, especially for those who love working with their hands. It's one of those creative hobbies for men who spend lots of time in their workshop making and fixing things. They may actually find pottery to be a more natural medium for artistic expression.
Pottery workshops are also a great opportunity to connect with others and expand your social circle. You'd be amazed at how many creative people pick up these creative hobbies in your area. Just join a class to see for yourself.
6. Woodworking Classes

Woodworking is a great creative outlet, and it’s also an extremely practical skill to know and can help you outfit your home with functional objects after creating some DIY projects. After learning how to work with wood, you can fix all those pesky chipped cupboards around the house.
7. Glass-Blowing Classes

For more unique, creative hobbies for men and women, explore how to design mesmerizing glass-blown works of art with glass-blowing classes. As you practice more, you’ll be able to make even more advanced pieces. This is when your creativity can really shine.
8. Art Classes or Paint and Sip
Art is such a broad category and encompasses a wide array of more specific artistic hobbies. Art classes are a great way to explore the different types of art to find which medium really speaks to you or challenge your artistic creativity in new ways. If you’re looking to make it into a bit of a social activity, grab your friends for weekly paint and sip events, so you can all relax and create together.
Creative Hobbies for Teenagers
Teenagers tend to stick with hobbies that feel social, expressive or just absorbing enough to pull them away from their screens for a bit. The best creative hobbies at this age build confidence, teach follow-through and give teens a place to channel all that curiosity and energy into something that feels their own.
9. Online Trivia Games

These quick-hit brain workouts make learning feel like competition, which is half the appeal. Online trivia games give teens a creative outlet without needing art supplies or a rehearsal space. It sharpens recall, teaches pattern recognition and builds confidence when they realise how much they actually know.
10. Game Nights

The most effective creative hobbies for teenagers are those that actually engage them and their friends, which is why game nights are perfect. If you can’t gather in person with a group, you can regularly engage in nights of brain-stimulating social fun with virtual game nights!
11. Paint Night
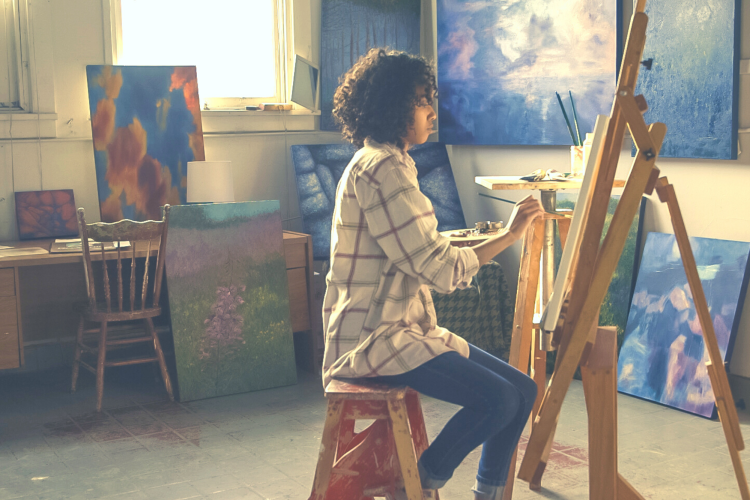
Painting gives teens permission to express whatever’s going on in their heads without needing impressive technical skills. It’s relaxing, it’s immersive and it gives them a finished piece that feels personal.
Teenagers who enjoy learning in person with others may want to explore painting classes near them. Or, for those who’d rather learn in the comfort of their own home, there are also plenty of online painting classes to choose from.
12. Papier Mâché
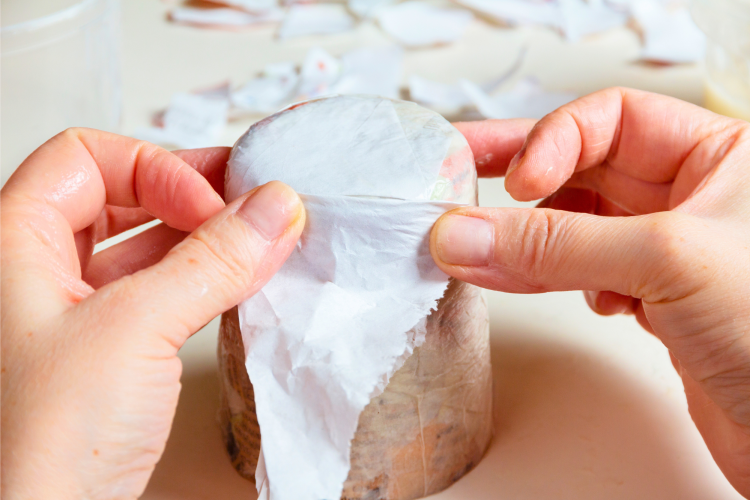
Kids, teenagers and adults who aren’t afraid to get their hands a bit dirty should give papier mâché a try. Using paper scraps and a glue/paste, you can create solid sculpture-like structures, which you can then paint and decorate once they dry. The creativity comes from thinking in 3D and seeing how simple materials can turn into characters or décor.
13. Magic
Magic has become quite popular on social media. Gone are the days of sawing people in half in kitsch sequined outfits. It's all about mind-reading, close-up card tricks, and a little bit of humor.
Exploring the intricate secrets behind illusions and sleight-of-hand deceptions is one of the more riveting, creative hobbies for teens. It's also a great choice for teens who want to impress or even start their own YouTube channel.
14. Sewing
Learning how to sew is an extremely useful skill to learn, especially when you suddenly need to repair your ripped clothes or even create new pieces for your wardrobe.
Some people learn how to sew from their parents and grandparents, but for those who have no seamstresses or tailors in the family, sewing classes are a great way to get started.
Creative Hobbies to Do at Home
Home is often the easiest place to start building a creative habit. There’s no travel, no schedule to juggle and no pressure to perform for anyone else. These at-home creative hobbies fit naturally into everyday life and give you simple ways to unwind, explore ideas and use your space in a more intentional way.
15. Cooking

Cooking at home becomes a creative hobby once you start experimenting rather than just following instructions. Trying new ingredients or learning techniques from online cooking classes helps you find your style. It’s practical, expressive and an easy way to add more joy to everyday routines.
16. Filming Makeup Videos

Another great creative hobby that doesn’t require you to leave the house is to film your own makeup videos. Whether you do it just for fun or decide to post them on social media and gain a following, it’s a great way to boost your self-confidence and have a bit of fun with beauty. It's also another one of the creative hobbies to do if you're into fashion, cosmetics and beauty.
17. Reading

There’s nothing better than curling up with a good book and letting your mind momentarily escape reality. When it comes to creative hobbies, reading is one of the most studied, and we know that it has immense benefits for cognition, learning, social skills and can even add years to your life, according to Harvard Medical School.
Go with the paperback if you want to step away from your devices for a few hours. Or get a Kindle and do it paperless. And no, scrolling Facebook doesn't count as a hobby.
18. Poetry

Writing poetry helps you express thoughts and emotions in a format with no rules other than the ones you set. It’s a great at-home hobby for anyone looking to turn feelings or observations into something meaningful without needing elaborate tools.
19. Writing
If poetry doesn’t speak to you, you can express yourself with other types of writing, whether it be blogging, drafting a memoir or writing a novel.
Practicing your writing is also a great way to improve your overall communication skills, which is another reason this is one of the creative hobbies for people who would like a bit more practice with communication.
20. Scrapbooking

When it comes to crafty hobbies, scrapbooking is one of the most widely discussed. Not only is it fun to artfully showcase pictures, momentos and other sentimental items, but the scrapbooks themselves become important legacies of cherished memories and past events.
Collect supplies like washi tape, stickers, stamps and other decorative elements to bring your memories to life.
21. Making Friendship Bracelets
No matter how young or old, making friendship bracelets is a great way to unwind and remind your loved ones that you care about them. There are different styles of friendship bracelets, whether you go with Taylor Swift bracelet ideas or something more generic. Keep in mind, you’ll need fine finger dexterity, creativity and a whole lot of love to make all of them.
22. Quilting
Once you get into quilting, it’s hard to turn back. It requires a surprising amount of mental engagement, and your finished products turn out absolutely stunning. Plus, you’ll feel even cozier snuggling up under a quilt you designed and made yourself. Speed up the learning process and collect quality fabrics with a monthly fabric craft kit delivery service.
23. Cross-Stitch

Cross-stitch is a beginner-friendly type of hand embroidery in which you create designs on fabric using small X-shaped stitches. There are plenty of beginner project kits, but if you’re feeling more creatively inspired, you can buy the fabric, thread and tools to make your own designs.
24. Clay Miniature Art
If you have an inexplicable love for all things tiny, you’ll likely fall in love with making miniature clay art. You can create anything from tiny food scenes to complicated dollhouse scenes, depending on your desired level of focus and difficulty. For something extra, you can then film short stop-motion videos with your clay miniatures.
25. Knitting

One of the most beloved creative hobbies, knitting, is soothing and relaxing and requires relatively little active thinking. Many knitters pick up their needles while they’re watching TV or otherwise relaxing for the evening and find that it’s a great way to unwind for the day.
26. Crocheting
Another popular activity among craft lovers is crocheting. It’s similar to knitting, except it only requires one needle. As a hobby, though, it produces the same relaxing effect as knitting and is an easy way to make your own hats, scarves and more.
Crochet kits for beginners make it simple to start this new hobby at home.
Creative Hobbies for Non-Creative People
Not everyone feels like a “creative person,” and that’s often because creativity gets linked to drawing, painting or big artistic talent. But creativity shows up in small, everyday ways too. The best creative hobbies for non-creative people are the ones that feel approachable, low-pressure and a little playful. These ideas help you ease into creativity without worrying about being good at anything yet.
27. Hone in on Your Culinary Skills

If you’re looking for a creative hobby that is just as practical as it is fun, consider joining cooking classes. No matter what your culinary skill level, there are always new ingredients and cuisines to explore. It's a great hobby for couples that encourages collaboration in the kitchen.
Taking in-person cooking classes is an exciting way to dive deeper into this hobby with other budding chefs. It's also a great creative outlet as you learn how to diverge from the instructions to create a culinary masterpiece.
28. Origami

Origami, the art of ancient Japanese paper folding, only requires paper, your hands and maybe some instructions. This makes it one of the easier yet rewarding creative hobbies for teenagers.
There are all sorts of unique designs to master, ranging from the ubiquitous paper crane to flowers, dragons and more. Here's our guide to creating a paper boat if you want to start immediately.
29. Puzzles
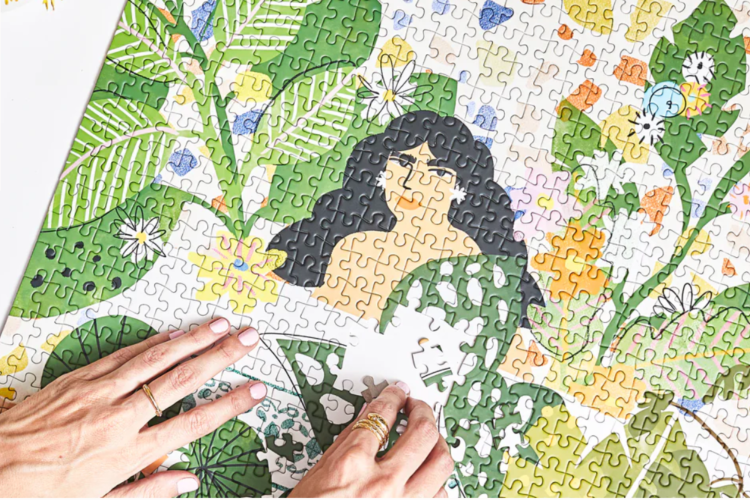
Another creative hobby that recently gained popularity is puzzling. There’s something so calming about fitting together different jigsaw pieces, and of course, the feeling of immense satisfaction when you finish is hard to beat. Frame your completed puzzles and give them away as gifts to friends.
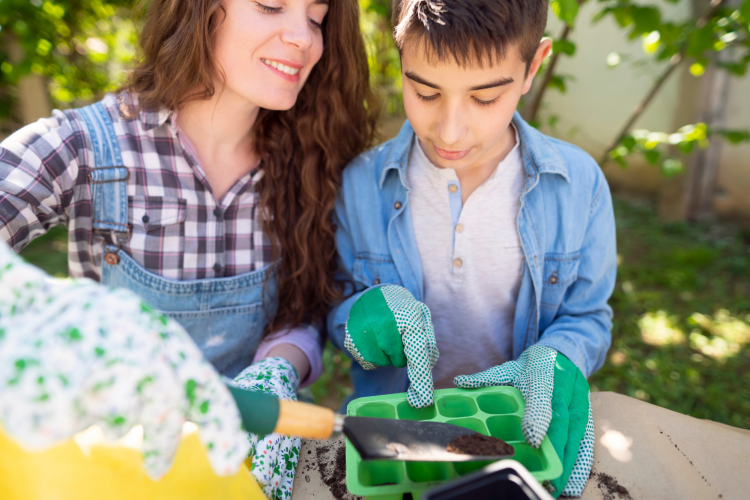
30. Gardening

Gardening is a great creative hobby because it helps you feel more connected to the natural world. From designing the layout of your flower beds, herbs, rocks and boxes to meticulously taking care of your plant babies, this activity has attention to detail, caring for living things, exploring nature without your phone, and a host of rewards (if you get it right). To get started, join a plant subscription service and receive new plants and grow kits every month.
31. Photography

When it comes to creative hobbies that make money, photography is probably the most popular and pursued choice. Many people even create separate photography Instagram profiles to showcase their best shots, whether they decide to sell their photos or not. There are so many types of photography out there, from food and wildlife to fine art and commercial. Start with our guide on how to learn photography for beginners.
32. Basket Weaving

This traditional creative hobby has been around for centuries, and all it requires to get started is wood or willow branches, twine or string and some pliers. It’s one of those creative hobbies that works well for people who love home décor, as you can place your hand-woven pieces around your home.
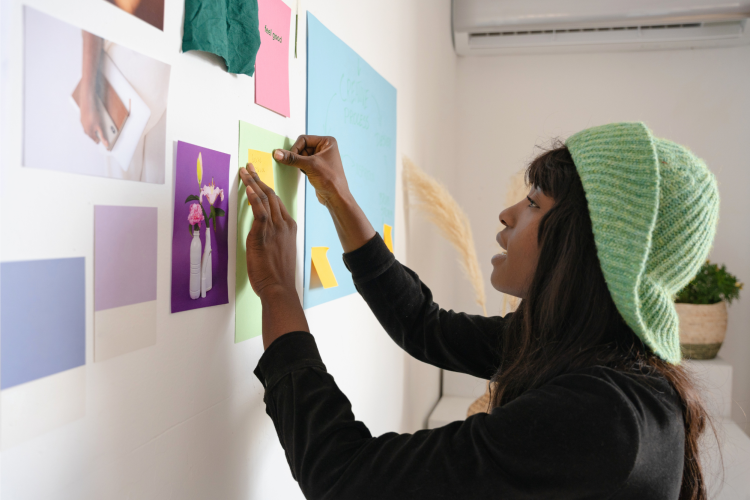
33. Bullet Journaling and Hand Lettering
Bullet journaling and hand lettering combine drawing with organization and design, thus allowing you to be expressive while also calming the mind with order and structure. It’s a creative hobby that complements scrapbooking, as well.
34. Crossword Puzzles
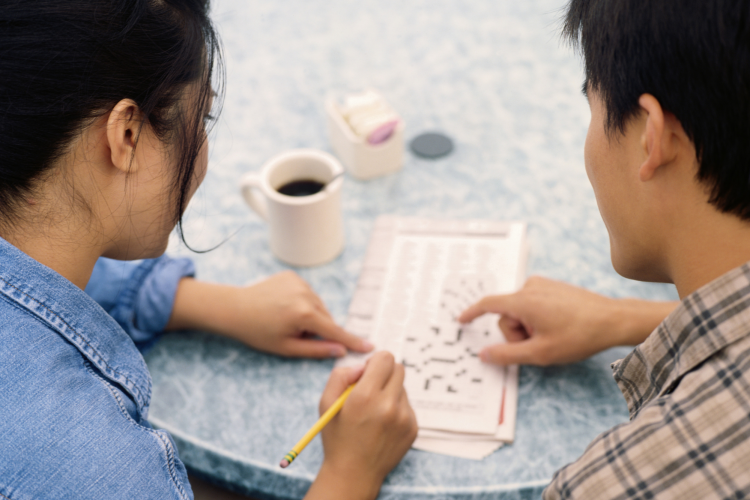
Doing a weekly crossword puzzle is a great way to keep your mind sharp and likely expand your vocabulary in the process. You can find puzzles in most popular newspapers, but there are also plenty of free crossword puzzles online.
35. Sudoku
For one of the more brain-engaging hobbies, consider picking up Sudoku. It’s a timeless numbers logic puzzle that requires you to arrange numbers 1-9 in a 9x9 grid such that each row, column, and 3x3 grid only uses each digit once.
36. Learning a Foreign Language
A slightly different hobby that's great for improving brain function is to learn a new language. No matter which language you choose, you’ll challenge the neurons in your brain in new ways. This is also one of the more practical creative hobbies, especially if you love to travel to different countries.
Creative Hobbies That Make Money
A creative hobby becomes income-friendly when you build skill, consistency and a style people recognise. You don’t need a full business plan to get started. Most of these hobbies grow naturally once friends, coworkers or social followers begin asking, “Can you make one for me?” Here are accessible ways to explore creativity while opening the door to extra income.
37. Drawing

Drawing reduces stress and sharpens focus, but it can also turn into a small business once you feel confident sharing your work. Selling prints online, offering commissions or posting progress videos can build interest over time. If you’re new to drawing, online drawing classes make the learning curve easier.
If there's enough interest, or you know how to market yourself right, you could start selling your doodles. Once you know it's working, try to sell them at a local craft fair.
38. Soap Making

It won’t take long to master the basics of making your own soap and from there, you can start experimenting with different ingredients, molds, colors for all the different types of soap. While creative hobbies like this save you money (you won’t have to buy soaps from the store anymore), you can also make a profit by selling your soaps to others, particularly local community members.
39. Nail Art
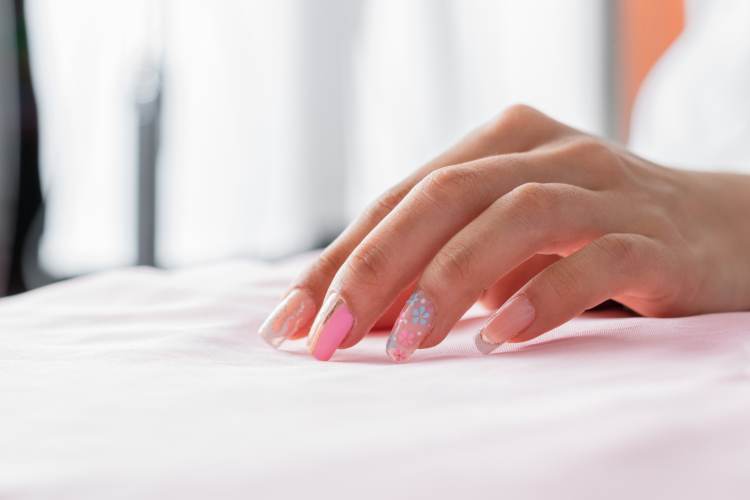
After a bit of practice, creative hobbies like this can quickly make you some extra cash, or at the very least, save you the expensive bill from going to the nail salon.
From stickers and gems to painting intricate designs, nail art is a fun way to add some extra glam to your manicure. You can practice with a friend or family member before going out into the world and charging for your services.
40. Computer Coding
Learning how to code requires creative problem-solving skills and practice. But once you’ve mastered the basics, it can quickly go from one of your creative hobbies into a money-making endeavor and even a professional career. Websites like Codecademy are great places to start.
41. Graphic Design

Similar to coding, graphic design is a creative hobby that can turn into professional work if you pick it up relatively quickly. This type of digital design requires lots of artistic innovation, especially since you want your computer-generated logos to be unique and recognizable for different companies and organizations. Explore user-friendly online programs like Canva that make it simple for beginners to get started.
42. Jewelry Making
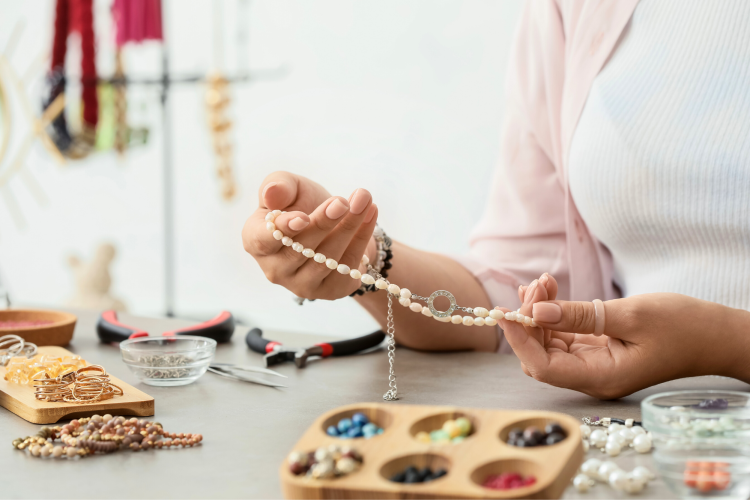
Designing your own necklaces, earrings, bracelets and more is exciting, especially when you start to sell your creations and see others wearing them. With creative hobbies like this, you can add a few new accessories to your own wardrobe without spending large amounts.
Master making gorgeous jewelry by joining the Simply Beads kit of the month club that delivers dazzling beads to your door, keeping you inspired every month.
43. Candle Making

Using wax, wicks and essential oils to mold your own scented candles, these creative hobbies are pretty enjoyable for people of all ages. If you’re feeling extra fancy, you can add beads, glitter and other decorative touches to your candles, too. Learning how to make candles or simply mastering candle-making 101 can be very satisfying.
44. Calligraphy

After you learn the basics of calligraphy, the fun begins as you can start to personalize letters and other projects with beautiful decorative letters. You may even find this creative hobby comes in handy for writing wedding invitations, thank you notes and other special notes.
Unique Creative Hobbies
Some hobbies stand out because they blend imagination with skills most people never think to try. These ideas offer a mix of challenge, curiosity and personality, and they’re perfect for anyone who wants something a little unexpected.
45. Dancing
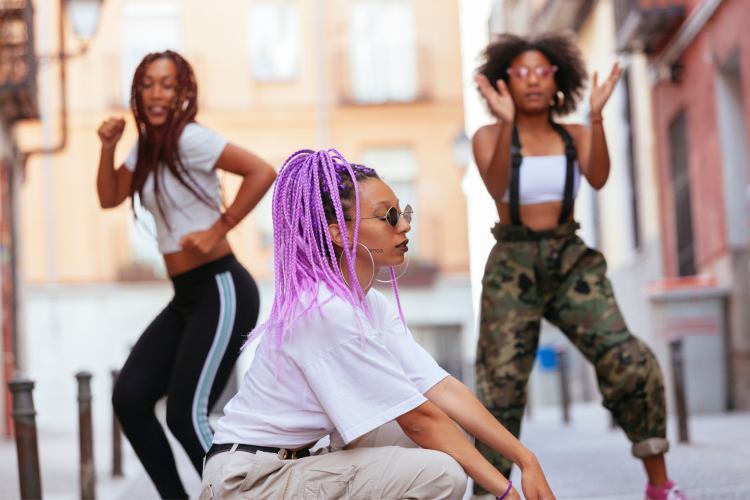
Dancing is a wonderful creative hobby for expressing your feelings and emotions through movement. Plus, there are so many different styles to explore, from contemporary and bachata to hip hop, salsa, jazz, tap and swing. Maybe you like to be a little risque and explore burlesque, pole dancing, or moving with your belly. If you're a social butterfly, become part of a community with line dancing.
Remember the importance of dance stretching before you go and feel free to try a few classes to see what you like best. Here's our guide to the history of dance if you'd like to explore these creative hobbies a bit more.
Once you’ve mastered some of the basic moves, you’ll be able to bust out your moves whenever you have a few minutes to spare, even if it’s just scheduling in a quick workday dance break, or breakdance!
46. Woodburning (Pyrography)
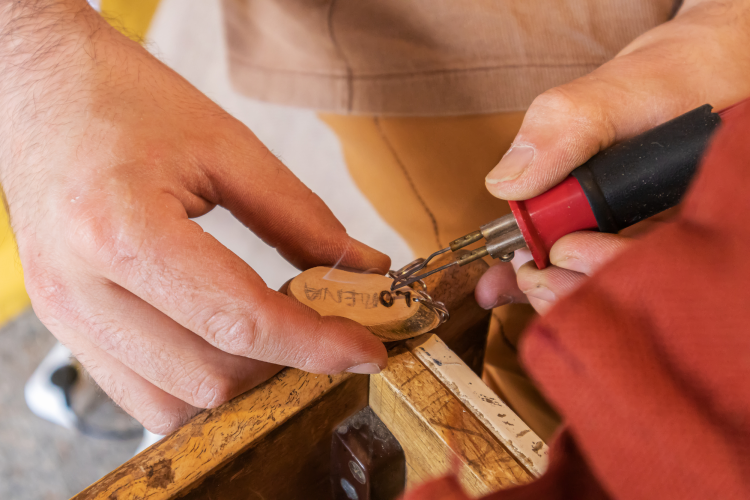
The same medium as woodworking but a bit more decorative, woodburning (also called pyrography) involves stenciling and then burning designs onto wooden surfaces. These are intricate, creative hobbies if you love detail. Combine this with woodworking for a more rounded hobby.
47. Woodcarving

Keeping on the theme of wood-related creative hobbies is woodcarving. This is more suited toward the artistic than the practical, but you can make beautiful functional pieces too, like coffee tables and bookcases.
It’s a very detail-oriented activity and requires a lot of focused attention, but carving your own wooden spoons and figurines can be extremely satisfying.
48. Metalworking and Welding

Although it’s one of the more involved and complicated hobbies, fashioning metal into tools and other items can be exhilarating and extremely worthwhile.
Welding and metalworking require lots of heavy tools and pose a safety risk if not done properly, so you’ll definitely want to take a few classes before tackling this on your own.
49. Virtual Problem-Solving Games

For those who love to challenge themselves, especially those who want to test the limits of their mental abilities, virtual problem-solving games are one of the more challenging creative hobbies. One of the hardest parts about games as a hobby is that you often need to get a whole group of people together.
Luckily, activities like virtual escape rooms and virtual scavenger hunts effectively eliminate the problem, which can make it easier to engage in these types of problem-solving experiences more regularly.
50. Acting and Drama

Acting is one of the more unique creative hobbies, but there is something so freeing about pretending to be an entirely different person and behaving in ways you never would normally.
Although it can be a bit nerve-wracking when you first begin, the more comfortable you get, the more fun you’ll have. It's a lesson in vulnerability. Acting classes and online acting classes offer the perfect atmosphere for exploring your inner thespian, whether you’re a novice or old pro.
51. Improv
A specific style of acting, improv requires wit, quick-thinking, teamwork and lots of creativity. All of this makes it one of the most entertaining creative hobbies; it's an enjoyable group activity for adults looking to find like-minded people.
There are tons of improv prompts and games to be found online, and you don’t need any props to start acting out hilarious scenes with your friends!
52. Cosplay

Cosplay costumes give you the chance to act out life as your favorite sci-fi, fantasy or other fictional character, but you’ll also have to design an accurate costume. It’s one of the more all-encompassing creative hobbies as it combines crafting and acting with your love for your favorite stories.
53. Irish Dancing
It may not be the usual style of dancing, but there’s something inherently uplifting about step dancing to a lively Irish jig. This is a great activity to boost your mood, and it also challenges both your mind and body.
54. Seed Art

Making art from seeds, also known as crop art, certainly qualifies as one of the more unusual creative hobbies, but that doesn’t mean it’s any less fun. People who engage in this uniquely creative activity regularly find it to be rather meditative, and the end results are pretty cool.
55. Weaving
Weaving your own yarns and threads into fabric is a unique skill that requires a bit of time and practice to learn. You’ll also need to invest in a loom, but once you know the basics, the creative possibilities for weaving are truly endless.
A great place to start is by exploring fiber art craft kits that come with all the supplies and easy-to-follow instructions you need to make this a hobby.
56. Bead Art

Bead art is a bit more mainstream than seed art, but both of these craft hobbies are very similar. Instead of seeds, bead art turns piles of teeny, tiny Perler beads into 3D structures, and it is also an extremely calming activity.
Explore these fun Perler bead ideas to get started. You can use them to make earrings, magnets, photo frames and more. If you want to make some money, start selling your projects on Etsy.
57. Making Felt Items

Making felt items is a niche hobby, mostly because it can be time-consuming and doesn’t have much practical application. However, the process can be extremely relaxing, and you’ll quickly fall in love with your super adorable felt animals, fruits and other creations, even if they don’t really serve a purpose.
58. Bone Carving
If you have lots of patience and enjoy fine detail work, then bone carving might be a perfectly weird hobby for you. Using electric tools or just basic files and sandpaper, you’ll carve intricate designs into small pieces of bone. It requires a lot of focus, which can help keep your mind distracted from unwanted thoughts.
59. Tarot Cards
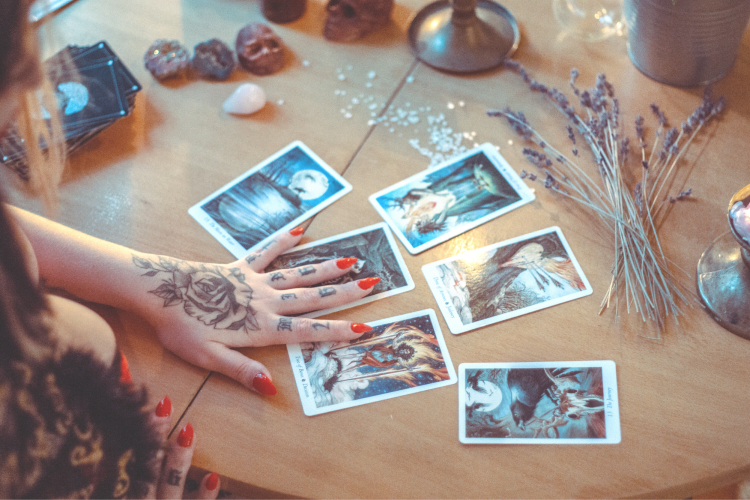
Some people are drawn to tarot cards as a means to gain spiritual insight about the world, while others simply admire the beautiful designs and artwork. Either way, this unconventional hobby of collecting (and using) tarot cards is quickly gaining popularity within pop culture.
60. 3D Printing
Using special software, a 3D printer can transform paper and plastic into physical 3D objects! Although you do have to invest in a printer, it's super exciting to explore, especially for those who love engineering and innovation.
61. Become a Cardshark

Spice up your next game night with some serious card-shuffling skills! Learning the different ways to shuffle a deck of cards is fun, sometimes challenging, but always impressive. You may even want to start a card deck collection in the process.
Outdoor Hobbies
62. Hiking

When it comes to outdoor creative hobbies, hiking should be at the top of your list. Connecting with nature has an instantly calming effect, plus you’ll see incredible views while getting some physical exercise. You can even get really creative with your route plan by taking some of the less common trails.
63. Backpacking
For those of you who don’t get quite enough from a simple day hike, backpacking is the next logical choice of activity.
This is one of those outdoor hobbies that really isn’t for everyone, but if your idea of fun is backcountry camping in the mountains for a few nights and hiking from summit to summit during the day, you’ll fall in love with backpacking adventures. Explore the most compact backpacking food ideas, grab your sleeping bag and head out for adventure.
64. Bike Touring

If you’re looking for a creative hobby that combines sightseeing with physical activity, then bike touring is perfect. Spend your free time cycling around and taking in scenic views, whether of the city skyline or natural landscapes.
65. Landscaping
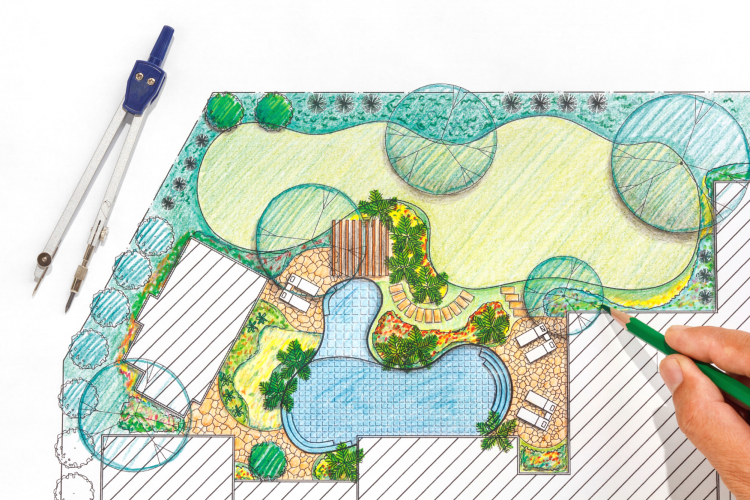
Landscaping is a great hobby for outdoor enthusiasts. After you design the layout of your yard, you’ll get to spend hours outside transforming your grass and dirt into something beautiful.
66. Beekeeping
Beekeeping is an excellent hobby for nature and wildlife enthusiasts, and you’ll feel better for helping the environment. In addition to tending to your hive(s), you can also design and plant a bee-friendly garden with plants that attract pollinators.
Musical Hobbies
67. Singing

Singing, either by yourself or with a group, is a wonderful way to express your emotions and feel connected to others. It naturally lowers stress and anxiety levels and can help boost your mood. Whether you have formal training or not, singing is a musical hobby all can enjoy.
68. Learning an Instrument
If you’ve never felt like much of a singer, you can get the same benefits of music-making from learning an instrument instead.
In fact, playing an instrument also requires physical coordination and challenges your mind in ways slightly different than singing. Not to mention, it’s always fun to bring out your instrument to impress your friends or serenade your lover.
69. Songwriting

Let your feelings manifest themselves through expressive lyrics or melodies by writing your own original songs. Depending on how extensive your musical knowledge is, you can explore different forms of composition, ranging from simple piano and singer works to complicated orchestral scores.
With so many creative hobbies out there, it’s up to you to find your favorite. No matter where you start, just keep trying different activities until you find one that really speaks to you, and before you know it, you’ll have an exciting new hobby.
Experience the fun and benefits creative hobbies have to offer and let them help you feel a little more like yourself again. For even more creative inspiration, check out other experiences happening on Classpop!