DIY Bath Bombs That Look Good, Smell Better & Relax You in 2026
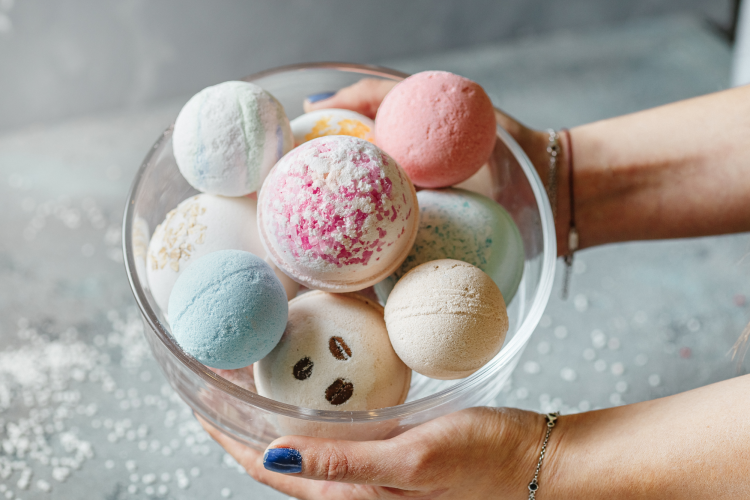
Bath bombs have become a real thing lately, but the truth is not all bath bombs are created equal. Some smell great, but dry out your skin. Others look pretty but are packed with ingredients you can’t pronounce. That’s where DIY bath bombs come in.
Making them yourself puts you back in control. You choose the scent, the color and, most importantly, the ingredients. Whether you want something calming, skin-friendly or just fun and fizzy, you can tailor each bath bomb to exactly what you like.
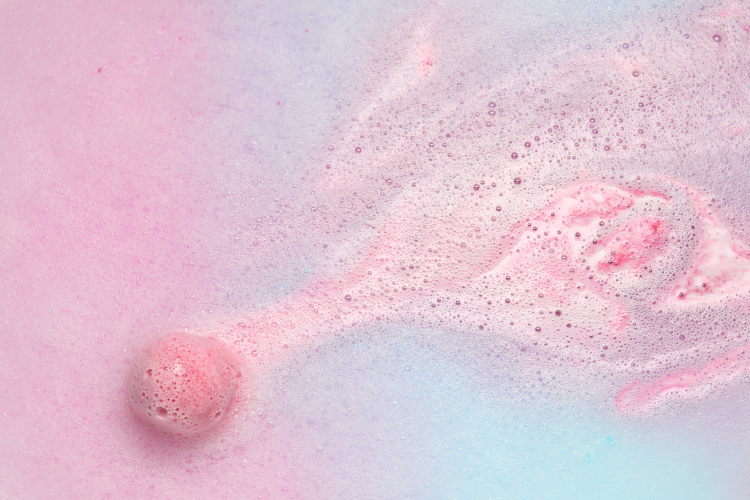
And that spa-like feeling does a whole lot more than just make the water fizz. Research on herbal bath bomb formulations shows that ingredients commonly used in bath bombs, like essential oils and plant-based additives, can enhance relaxation, improve skin feel and turn an ordinary bath into a more therapeutic experience. In other words, it’s not just the bubbles — it’s the combination of scent, warmth and skin-soothing ingredients working together.
That’s what makes DIY bath bombs especially satisfying. You’re not just crafting something cute, you’re creating a better bath.
Jump to Section
- How Do You Make DIY Bath Bombs?
- Professional Bath Bomb Recipe
- Homemade Bath Bombs Without Citric Acid
- Recipe for 3 Ingredient Bath Bombs
- DIY Bath Bombs for Kids
- Tips for Perfect DIY Bath Bombs (and Common Mistakes)
How Do You Make DIY Bath Bombs?

Once you understand what goes into a good bath bomb, making them at home is surprisingly simple. With just a handful of basic ingredients, you can control the scent, texture and skin feel while creating something that looks just as good as it works. Making DIY bath bombs at home is a pretty fun DIY home project, either for self-use or even as gifts for friends and family.
This DIY bath bomb recipe makes four half-ball bath bombs and takes about 30 minutes to prepare, plus a few hours to set. It’s a great starting point if you’re new to bath bomb making and easy to customize once you get comfortable with the process.
What You’ll Need for This Easy Bath Bomb Recipe
Ingredients
- 100g baking soda
- 50g citric acid
- 25g cornstarch
- 25g Epsom salt (optional)
- 2 tbsp oil (such as sunflower, coconut or olive oil)
- ¼ tsp essential oil (such as lavender, chamomile or orange)
- A few drops of food coloring
- Dried orange peel, lavender or rose petals for decoration (optional)
Equipment
- Mixing bowl
- Whisk
- Plastic molds (muffin tins or silicone molds work too)
Instructions
- In a mixing bowl, add the baking soda, citric acid, cornstarch and Epsom salt. Whisk until fully combined.
- In a small bowl, combine the base oil, essential oil and food coloring. Stir well to integrate the color into the oil.
- Gradually add the oil mixture to the dry ingredients, whisking as you go. Add a few drops of water (it may fizz slightly) and mix quickly until the mixture clumps together when pressed. Adjust the water to get the right texture — firm but not wet.
- If adding petals or peels for decoration, place them in the mold first. Then, tightly pack the bath bomb mixture on top, pressing it down with a spoon for a smooth finish.
- Allow the DIY bath bombs to dry in the molds for two to four hours, then gently remove. Once fully hardened, they’re ready to use or gift.
Professional Bath Bomb Recipe

Once you’re comfortable with the basic bath bomb recipe, you can make some upgrades with some pro-level ingredients that improve texture, bubbles and the overall bath feel. The result is smoother, longer-lasting bath bombs that look polished and feel more like something you’d buy at a boutique spa shop. The end product looks more impressive and gifts are especially well-received.
What You’ll Need for This Professional Bath Bomb Recipe
Ingredients (Makes 3 DIY bath bombs)
- 250g Baking soda
- 130g Citric acid
- 3g Kaolin clay
- 3.5g SLSA (for added bubbles)
- 2g Aquamarine mica powder (for color)
- 5g Sweet almond oil
- 6g Chamomile essential oil
- 3g Polysorbate 80 (prevents color from staining the tub)
- 2g Water
Equipment
- Bath bomb molds (available in the DIY bath bombs kit)
- Large mixing bowl
- Measuring jug
- Weighing scale
- Gloves
- Spray bottle
Instructions
- Mix dry ingredients: Weigh and combine the baking soda, kaolin clay, SLSA and mica powder in a bowl, leaving the citric acid aside for now.
- Add wet ingredients: In a separate bowl, combine sweet almond oil, essential oil, polysorbate 80 and water. Stir well and mix thoroughly into the dry ingredients.
- Add citric acid: Weigh the citric acid and fold it into the mixture, ensuring an even blend.
- Check texture: Squeeze a small amount of the mixture — it should hold together like damp sand. If too crumbly, lightly spray with water, adding only as needed.
- Fill molds: Gently pack the mixture into each half of the mold. Press together and let sit for about 30 minutes.
- Unmold and dry: Carefully remove each half of the mold, leaving the DIY bath bombs to dry for about an hour.
A Quick Note on Glycerin
You might notice this recipe skips glycerin, which is often included in commercial bath bombs. While glycerin can help create a smoother finish, it isn’t essential for structure or performance. Even without it, you’ll still get firm, fizzy DIY bath bombs that feel great in the tub.
Homemade Bath Bombs Without Citric Acid

If you want to make DIY bath bombs but don’t have citric acid, or if you’re looking for a gentler alternative for sensitive skin (or perhaps children's spa day), cream of tartar works as a simple substitute. The fizz is softer and slower, which actually makes the bath feel more relaxing and less bubbly-chaotic. It also helps the bath bombs hold together nicely, so you don’t lose structure by skipping citric acid.
To replace citric acid in any bath bomb recipe, simply swap in 1 cup of cream of tartar for each cup of citric acid. Cream of tartar acts as a mild acid; it still reacts with baking soda to create that signature fizz, just at a calmer pace that lasts longer in the tub.
This makes cream of tartar a great choice for anyone with sensitive skin or allergies. Speaking of skin allergies, what is the best oil to use in bath bombs? When it comes to oils, gentler options tend to work best — coconut oil for moisture, sweet almond oil for softness or sunflower oil for a lightweight feel are all commonly well-tolerated. As always, testing a small amount on skin first is a smart move when trying anything new.
Recipe for 3 Ingredient Bath Bombs

If you want to keep things as easy as possible, this version strips bath bombs back to the basics. No extra oils. No fancy additives. Just the core ingredients that create fizz and hold everything together. With just baking soda, citric acid and water, you’ll have all you need to create DIY bath bombs that fizz, soften the water and leave skin feeling smooth.
This simple recipe is perfect for first-timers, quick crafts for kids or when you want something relaxing without a full crafting session. Plus, they make for good DIY home decor to put in a clear jar in your bathroom.
What You’ll Need for These 3 Ingredient Bath Bombs
Ingredients
- 1 cup baking soda: This forms the base of the bath bomb, softening water and providing a gentle clean.
- ¼ cup citric acid: This reacts with the baking soda to create that satisfying fizz when the bath bomb dissolves in water.
- 2 tablespoons water: Just enough to bring the mixture together; spray it in gradually to avoid premature fizzing.
(Tip: Use a spray bottle if you have one so the mixture doesn’t fizz too early.)
Instructions
- Mix the baking soda and citric acid in a bowl until fully combined.
- Slowly mist in the water while stirring — just until the mixture feels like damp sand and holds its shape when pressed.
- Pack firmly into molds or muffin tins.
- Let dry for a few hours before gently removing.
Once dry, these simple DIY bath bombs are ready to add to a bath. They’ll fizz on contact with the water, offering a touch of homemade luxury with minimal ingredients. Plus, making them is an excellent stay-home date idea.
DIY Bath Bombs for Kids

When kids are involved, simple and gentle wins every time. This version skips citric acid and uses softer ingredients that are less likely to irritate sensitive skin, while still creating that fun fizz kids love.
It’s easy to make, forgiving if measurements aren’t perfect and perfect for creative, indoor birthday party ideas or creative play that doesn’t involve screens.
What You’ll Need for These Kids' Bath Bomb Recipes
Ingredients
- ½ cup cornstarch
- ½ cup Epsom salts (Note: Some people may be allergic to Epsom salts; if needed, substitute with baking soda)
- 1 cup baking soda
- 4 tablespoons cream of tartar (acts as a gentler alternative to citric acid)
- 2½ tablespoons coconut oil (adds moisture)
- Water (in a spray bottle for controlled mixing)
- Essential oil (optional, for fragrance; choose child-safe options like lavender or chamomile)
- Food coloring (optional, for fun colors)
- Muffin tin or other molds
How to Make Them
- Mix all dry ingredients in a bowl.
- Melt the coconut oil slightly and stir it in.
- Add a few sprays of water at a time, mixing until it holds together when pressed.
- Add color or scent if using.
- Pack into molds and let dry for a few hours.
Kids can help mix, press and choose colors while you handle any pouring or measuring. The result is a gentle bath bomb that makes bath time feel special without harsh ingredients.
Tips for Helping Kids Make Bath Bombs (Without the Mess Meltdown)
Making DIY bath bombs with kids is part craft project, part mini science experiment and part learning to slow down and mix carefully. A little setup goes a long way toward keeping it fun instead of frantic.
1. Set Up a Kid-Friendly Workspace
Prepare your space by covering the table with a protective layer like newspaper, wax paper or an old tablecloth. This not only makes cleanup easier but also gives kids the freedom to mix and pour without worry. Have all ingredients and tools within reach, including measuring cups, bowls and molds, so they’re ready for each step without interrupting the fun.
2. Explain the Science Behind the Fizz
Before diving in, give a quick, kid-friendly explanation about why bath bombs fizz. Talk about how baking soda and citric acid react when they meet water, releasing carbon dioxide bubbles and creating the fun fizz. For younger kids, compare it to bubbles in soda to keep it simple. It’s a great opportunity to sneak in a mini science lesson and spark curiosity.
3. Start Small with Colors and Mix Carefully
Kids love bright colors, but just a drop or two of food coloring goes a long way in bath bombs. Use colors that are skin-safe and non-staining to prevent any surprises in the tub. Encourage kids to stir well after each drop of color to avoid clumps and if they’re excited about mixing colors, help them experiment with shades like pink, purple or light blue for an extra personalized touch.
4. Let Kids Customize Scents and Add-Ins
Essential oils like lavender, chamomile or orange can make DIY bath bombs smell wonderful and add a relaxing touch to bath time. Allow kids to pick their favorite scent, but keep in mind that only a few drops are needed to avoid overpowering the bath bomb. If they want to add decoration, let them sprinkle in dried flower petals, biodegradable glitter (kids love this) or a pinch of dried herbs for a unique touch. Be sure to remind them that a little goes a long way!
5. Supervise and Assist Throughout
Making DIY bath bombs can get messy and involves some measurements and careful mixing. Be close by to help measure, add ingredients and guide kids through each step. As they get the hang of it, let them take more responsibility, from pouring the baking soda to pressing the mixture into molds. Being hands-on helps boost their confidence and they’ll love seeing their creation come together.
Tips for Perfect DIY Bath Bombs (and Common Mistakes)
Once you’ve made a batch or two, you’ll start to get a feel for the texture that works best. Most bath bomb “mistakes” come down to moisture, packing and patience.
- If the mixture keeps crumbling: it’s usually too dry. Lightly mist with water or oil and mix again until it feels like damp sand and holds together when pressed.
- If it starts fizzing while mixing: too much liquid went in too fast. Use a spray bottle and add moisture slowly to save the reaction for the bath instead of the bowl.
- If bath bombs crack while drying: humidity or unmolding too early is often the culprit. Let them sit longer or move them to a drier room.
- If there’s barely any fizz in the tub: check your ingredients. Older baking soda and acids lose strength, which weakens the reaction.
- For smoother, sturdier bath bombs overall: pack molds firmly and allow plenty of time to fully set before removing.
Make these DIY bath bombs on a rainy day, with the kiddos or just with your partner. When you choose the scents, textures and ingredients yourself, each soak becomes more personal, more relaxing and a lot more enjoyable than tossing in something store-bought.
Whether you keep it simple with three ingredients, experiment with spa-style recipes or make colorful versions with kids, the process is half the fun. And the reward is a bath that smells better, feels better and fits exactly what you’re in the mood for.
They’re fun to make and delightful to use. Try your hand at other crafts like candle making or knitting while you’re at it. For even more fun DIY ideas, check out other experiences happening on Classpop!